Quick overview
- What you’re getting into: Hardcore turn-based tactics meets deep base management. Every tactical call directly impacts your bottom line, creating a unique “every shot costs money” strategy loop.
- Quick Tip: Once you unlock the base in the main campaign, the financial reality hits hard—you’re on the hook for all operational expenses. This guide breaks down practical ways to keep your head above water when resources run tight.
- For what kind of player?: Players who love modern warfare settings, deliberate, methodical gameplay, and complex mechanics worth sinking their teeth into.
- Difficulty flexibility: Beyond the initial learning curve, overall difficulty settings combined with per-mission tiers (from Easy to Nightmare) let players tailor the challenge to their own pace.
- Tested On: 19 Hours Played (Campaign in Progress)
Currently, the game is available on Steam. Get the full game here: Warhounds
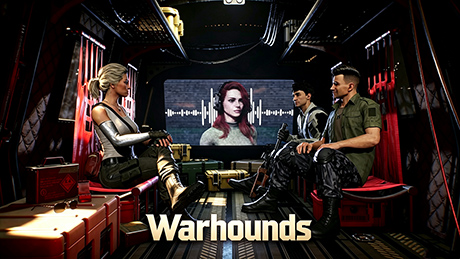
Warhounds is a deep strategy game that combines turn-based tactical combat with base management.
Players assume the role of a commander, advancing their progress by building bases, recruiting agents, directing missions, and safely extracting. At the same time, they must navigate constant financial pressure—balancing combat with supply logistics is the central challenge that runs throughout the game.

Used under fair use for commentary, criticism, and educational purposes.
As a strategy title, it offers plenty of depth; the combination of main quests, side missions, and randomized encounters makes for a fully immersive experience. With its tight combat loop and deep tactical mechanics, it’s an easy recommendation for strategy fans.
Warhounds is packed with systems and subtle details, so I’ll try to go as deep as possible into the features, mechanics, and strategies I’ve tested or uncovered firsthand during my time with the game.
Combat Breakdown & Practical Tips
Tactical Movement & Rules
The game uses grid-based tactical movement where each squad member gets two actions per turn. Your choices include moving, attacking, setting up overwatch, reloading, reviving downed teammates, healing (yourself or allies), and throwing tactical gear. While specific classes get unique abilities, basic actions like moving and shooting are universal across all units.
Enemies play by these exact same rules—keeping that in mind makes it much easier to predict their movement and stay in control.
Every single move consumes an action. If you miscalculate before running out of points—like leaving someone out in the open—that squad member can take heavy damage or get wiped out instantly. Think through every action before committing; it directly determines whether your team makes it back alive.
Incapacitation & Permadeath
When a teammate drops, they don’t die immediately. They enter an incapacitated state, giving other operators a chance to burn an action to revive them. Once brought back, they suffer a reduced max health penalty for the rest of the deployment. After extracting, injured teammates automatically go to the hospital to recover, so you can’t use them on the next mission. However, if a downed operator takes another hit before you can reach them, they’re dead for good—resulting in permanent loss of that squad member.
Cover, Terrain & Explosives
Finding good cover during combat is everything. Crates, fences, fuel barrels, explosives, and cars are destructible and risky to rely on; solid walls or sandbags are much safer bets. Also, keep an eye on elevation—holding the high ground almost always gives you a distinct tactical edge.
Don’t panic, though—destructible cover doesn’t disintegrate or detonate instantly. Cars and single fuel barrels only catch fire on the first hit, exploding or breaking apart on the second. Use that short window to reposition somewhere safer. The main exception is stacks of red gas canisters: those blow up on the very first hit, so give them a wide berth.
Beyond managing cover, keep close tabs on enemy positions and try to predict whether they’ll push your line or flank you on their next turn.
From my own experience, if your finances allow it, stack as many grenades as humanly possible. I recommend running 2 grenades per person—8 total for a full four-man squad. Grenades bypass elevation and enemy cover states (unless you’re dealing with a fully enclosed space). As long as you’re in throwing range, the wide blast radius deals massive damage or scores instant kills, making them your best option for flushing out snipers and dug-in targets on high ground.
Class Divisions
In Warhounds, line of sight and range drop-off affect every class, cutting into accuracy or causing outright misses. Up close, put two units face-to-face with zero cover between them, though, and shots land 100% of the time—no misses, no rng frustration.
Hit rate is only part of the equation. A unit’s actual combat output hinges heavily on their class rank, skill levels, and loadout configuration.
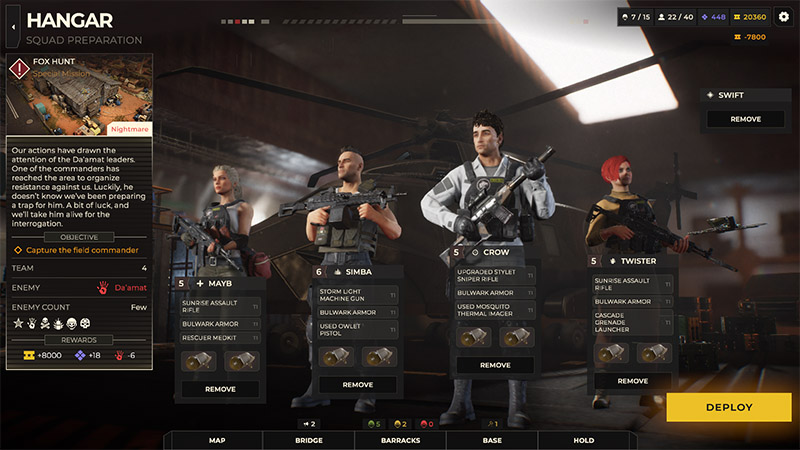
Here is how the roles stack up:
- Assault Trooper: Built for close-quarters bursts and high mobility. Great for punching through lines, but the short engagement range leaves them exposed in long-range firefights.
- Sniper: High single-shot damage and extreme range, ideal for picking off priority targets—though they still require a clean line of sight and remain heavily blocked by cover.
- Specialist: The squad’s combat medic. Packs team buffs, high-tier healing abilities, and extra utility slot capacity for medical supplies.
- Grenadier: A throwables expert who can mount grenade launchers. Unlike snipers, their area-of-effect explosives easily bypass low cover, making them far more reliable against entrenched targets—though solid walls still block the blast, and limited ammo keeps them in check.
- Machine Gunner: Heavy fire support with raw damage output. Capable of destroying or penetrating various types of cover to expose hidden enemies.
Green recruits start off without a class or unique skill tree, but they cost a lot less in salary. Once they earn a few missions under their belt and get promoted, their class traits and skills kick in.
This is just a quick overview—with so many variables influencing each class, there’s a lot more depth once you start building a squad, so it’s best to jump in and experiment with the setups yourself.
Operative Details: Info, Equipment & Skills
INFO
The INFO tab displays the operative’s name, current level, rank tier, class role, base attributes, current status, salary cost, biography, mission stats, and management options.
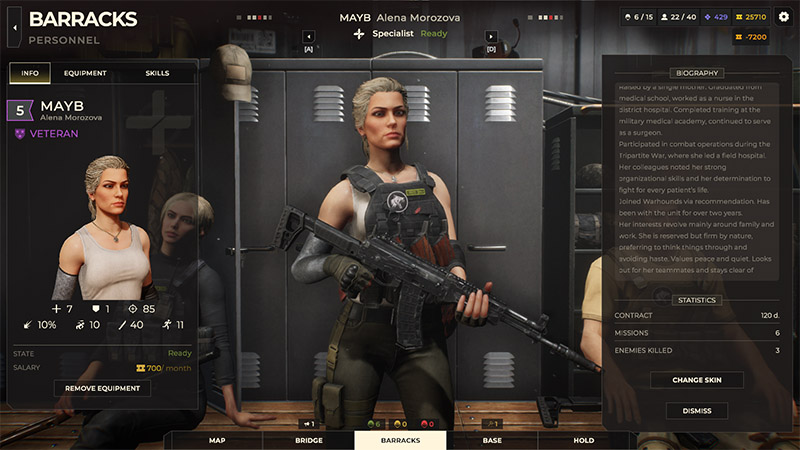
An operative’s salary depends on their level and stats—stronger stats naturally mean higher pay.
Ranks follow a color-coded rarity scheme similar to RPG gear tiers: NEWBIE (1-star gray), SEASONED (2-star blue), and VETERAN (3-star purple).
What surprised me most is that every hired operative comes with detailed profile data and a fleshed-out backstory, showing an impressive level of detail.
EQUIPMENT
In the EQUIPMENT tab, you can directly swap and customize gear for each operative, including primary weapons, body armor, sidearms, throwables, and tactical equipment.
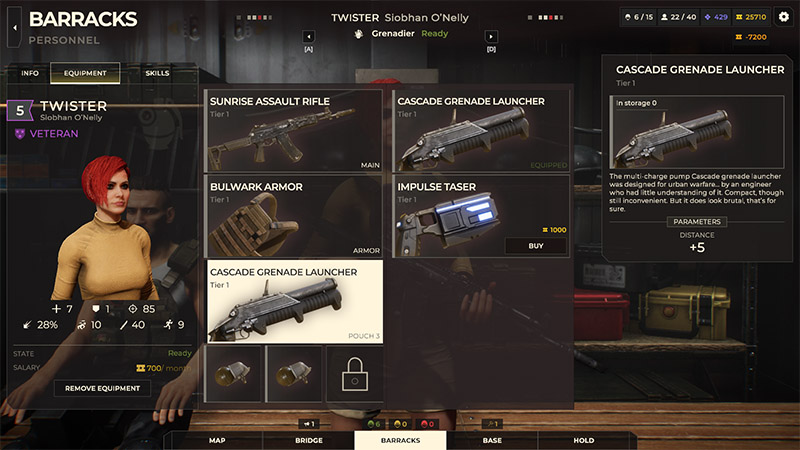
All gear must be acquired through the Contract system—you must sign contracts with suppliers beforehand to unlock their gear so you can actually buy it.
Additionally, available loadouts are restricted by operative classes: snipers can equip high-magnification scopes, grenadier can attach grenade launchers, and medics can carry extra healing items.
SKILLS
The SKILLS tab displays the skill tree from LV1 to LV8 for the current class, complete with skill descriptions and XP progression. Each operative class features its own unique skill system.
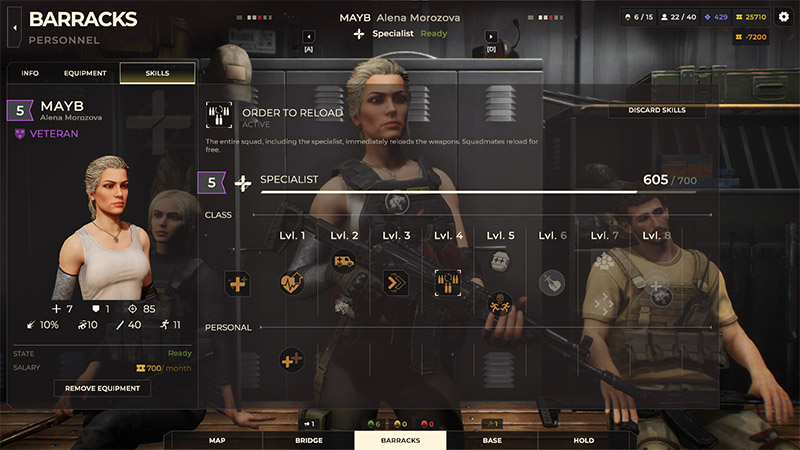
Mission deployment sizes vary by type: main operations require a four-person squad, while rescue ops limit you to a duo. Since skills are tied directly to an operative’s class, you’ll want to mix classes and builds to fit the objective, giving your squad a better shot at survival.
Dangerous Enemies
Certain high-threat enemies will appear during combat, each introduced with a dedicated cutscene—when you see it, gear up and stay sharp.
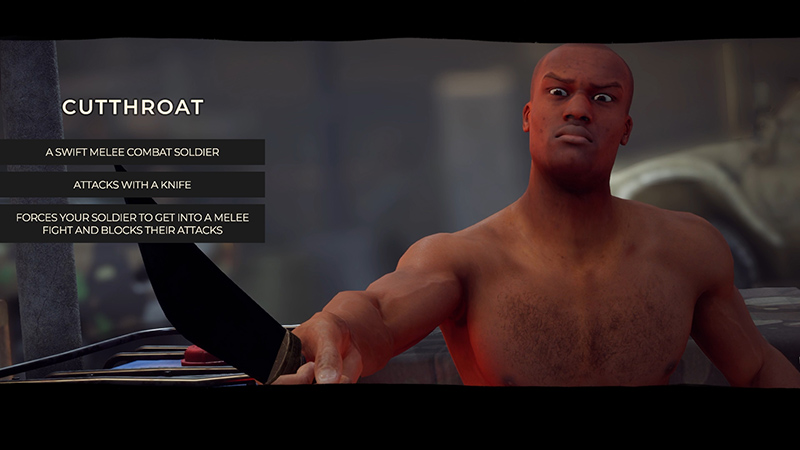
These units possess unique attack patterns, such as (the names below are descriptive placeholders, not official in-game titles):
- Heavy Gunner: Heavily armored with high damage output, dangerous at both close and medium range.
- Cutthroat: Melee knife-wielders that rush in to pin down your squad members. If an ally doesn’t rescue them within two turns, the pinned member is killed instantly.
- Sniper: Extremely lethal at long range and repositions frequently, making them exceptionally hard to lock down.
- Suicide Bomber: Explosive-strapped enemies that charge straight toward your squad to detonate.
Due to space constraints, we won’t cover every special enemy here. Just keep one rule in mind: these targets must be eliminated first.
Base Management
Base management options unlock progressively as you advance through the main story. Keep in mind that your base only becomes available once you secure the ship. Here is a breakdown of the management panel and key features.
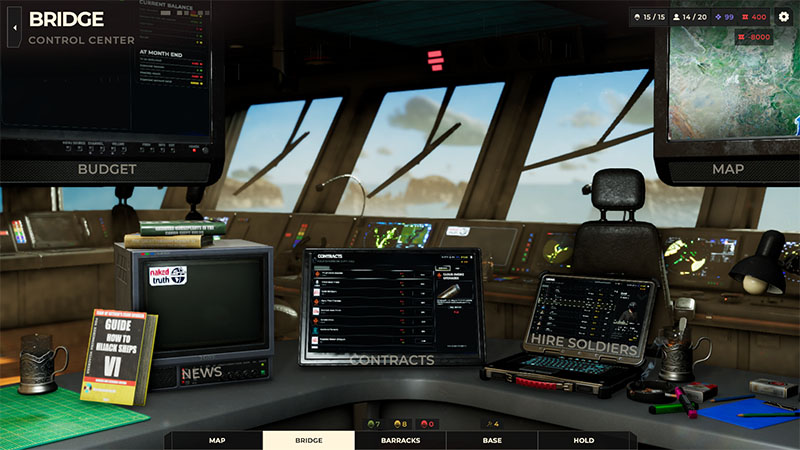
As the commander, your office is the Bridge—the nerve center of your entire base. The five terminals on your desk correspond to the core management functions:
BUDGET
The budget interface is divided into four core panels:
- EXPENSES — Tracks operational costs, including recruitment fees and monthly soldier salaries.
- INCOME — Records revenue generated from completed missions.
- CURRENT BALANCE — Calculates your live financial state by factoring last month’s balance against current earnings and expenses.
- AT MONTH END — Projects your projected account total after deducting upcoming overhead.
With real-time tracking and financial forecasting, this screen clearly flags deficit risks—helping you adjust payroll or mission priorities before running out of cash.
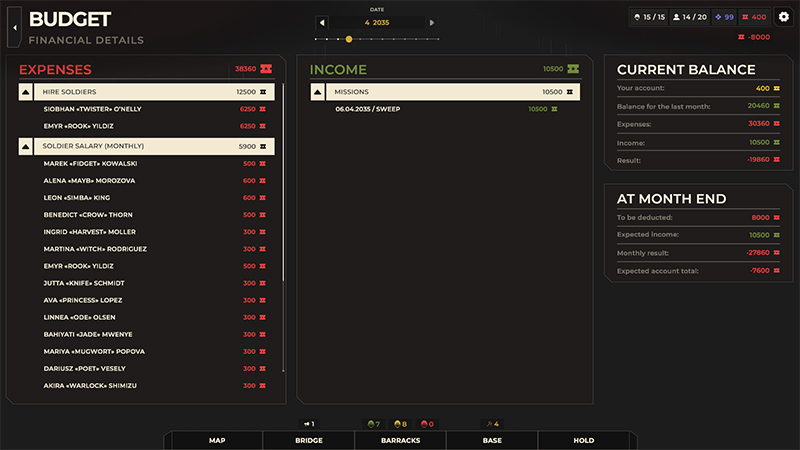
While the budget panel is detailed, you only need to focus on the big picture: your largest overheads are operator salaries and base expansions. As long as you keep those two under control early on, money won’t be much of an issue. Of course, if you’re running missions back-to-back with a high success rate, you’ll rarely find yourself short on cash.
NEWS
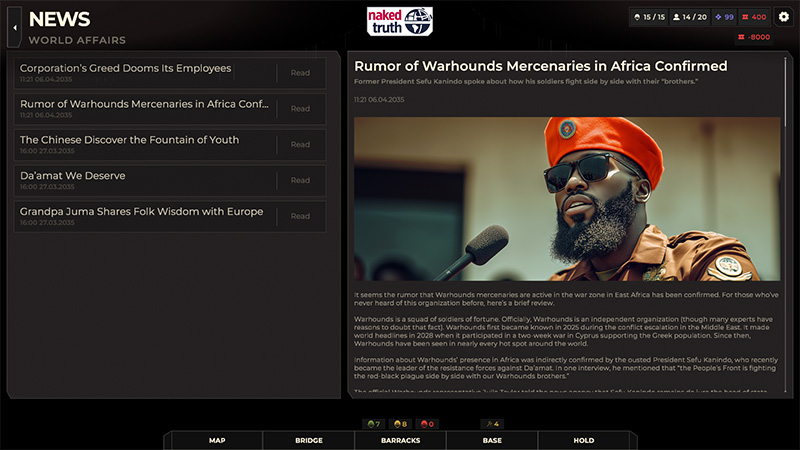
The NEWS terminal is an in-game feed run by the fictional outlet Naked Truth, featuring a dedicated WORLD AFFAIRS subcategory. Rather than serving as a static lore dump, it broadcasts real-time news reports that bring to life a volatile, evolving African theater of war.
CONTRACTS
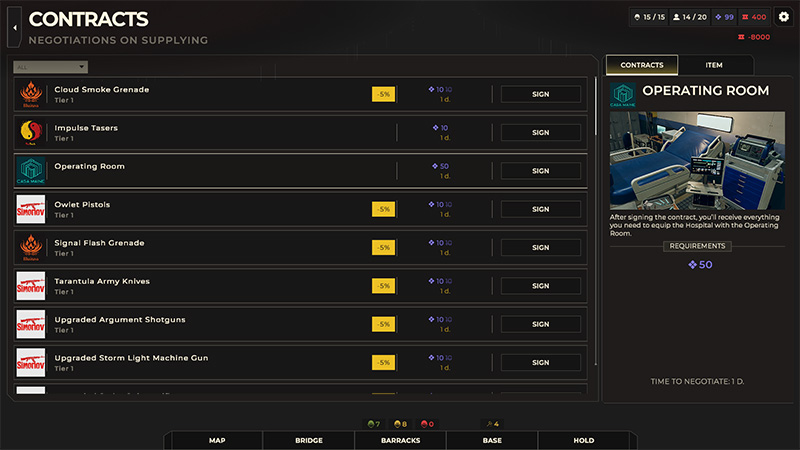
The CONTRACTS terminal handles your gear supply chain. Its main job is securing agreements with various arms dealers—once signed, you’ll unlock their specific catalog of weapons and equipment for your operators to purchase and field.
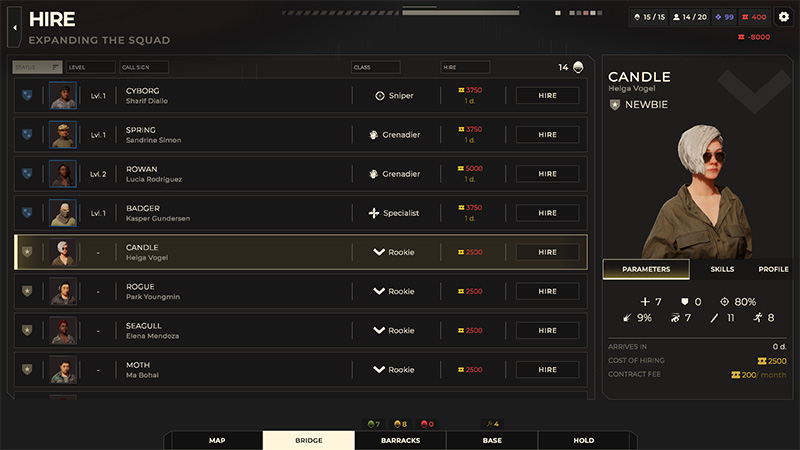
HIRE SOLDIERS
The HIRE terminal is your main hub for expanding your squad, where you review, screen, and sign specialized operators for upcoming ops. It isn’t just a place to pick up extra bodies—it’s the strategic starting point for building out your primary combat roster.
Each candidate features a detailed file—showing their stats, specs, and personal background—giving you everything you need to evaluate them and make your call.
Don’t rush to recruit too many members early on unless the tasks really require it. Team members’ salary expenses are high, and having too many people can easily lead to a tight budget. Don’t hesitate to cut the dead weight — members who aren’t currently needed.
MAP
The MAP serves as your primary command hub for issuing operational orders.
This screen dynamically updates over time with random events, weather conditions, and available main or side missions—complete with key details like rewards, estimated duration, and difficulty ratings to help you decide which contracts to take on.
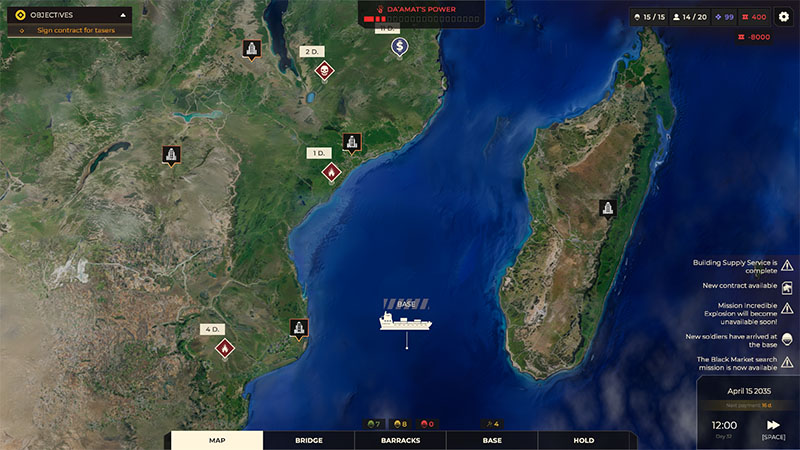
Don’t take on tasks labeled “Hard” in the early game — the failure rate is high, and you risk losing team members. Focus on easier missions first to build up your funds, and save the tough ones for when you’re ready.
If you really want to give a Hard mission a shot, make sure to save manually beforehand so you can reload your save if things go south.
Staying in the Black
I might’ve covered money management before, so here’s a short summary.
You get solid starting credits, but base building plus daily operative upkeep quickly drains funds. To stay profitable, here are my personal tips:
Stick to Main & Side Missions
These are your main income — you need to fight them manually. Auto‑dispatch rewards are low. Start on Easy to gear up your squad. Move to Hard or Nightmare once ready; greater risk equals much better pay.
Keep a small roster
Avoid hoarding idle operatives. Every team member costs resources constantly, and a bloated roster will crash your budget.
Sell surplus loot
Offload extra gear and spoils from missions. Many items sell well for fast cash.
Build only essential base upgrades first
Facilities are expensive. Prioritize high‑value structures. Save non‑critical builds for late‑game when credits are abundant.
This isn’t a complete guide, but these basics will keep you solvent. Hope this helps.
Other Base Facilities
BARRACKS
The BARRACKS houses four key facilities: the Locker Room, Training Ground, Hospital, and Saloon.
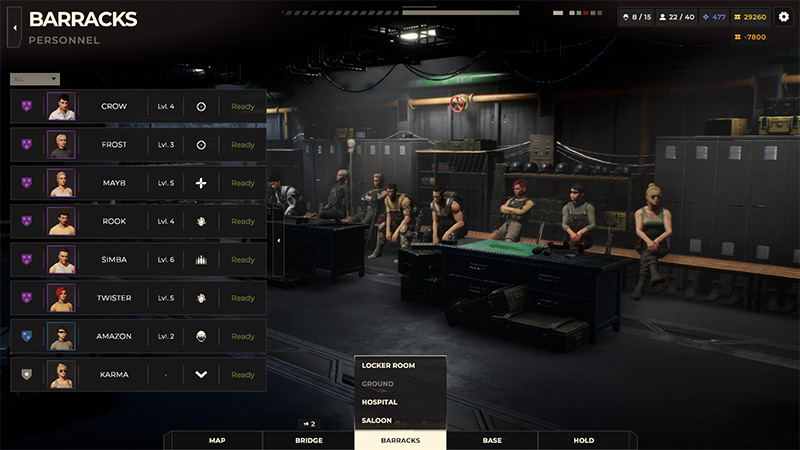
These facilities aren’t available from the start—you’ll need to spend funds to build them. Except for the Hospital, which is a top build priority, hold off on the rest until your treasury is solid. Whatever you do, don’t drive yourself into debt just to build facilities, as going broke will trigger a Game Over.
LOCKER ROOM
Only recruited mercenaries can have their appearance customized here. Customizable options include outfit styles, accessory colors, armor cosmetics, hairstyles, facial features, skin tones, tattoos, and more.
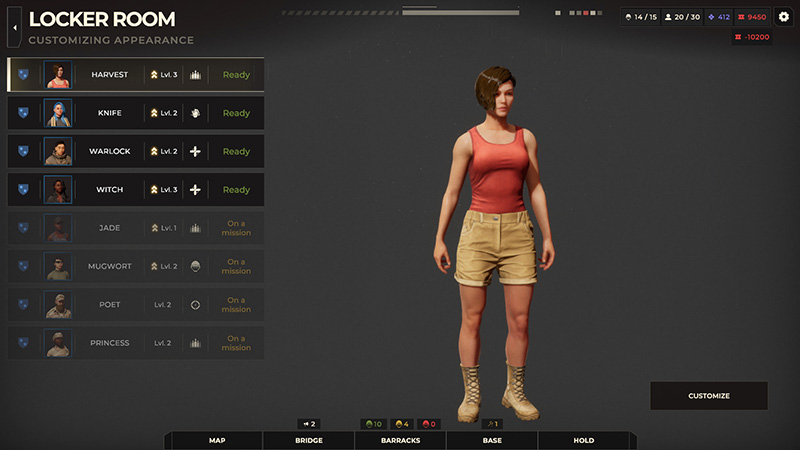
The game’s four default main agents will not appear here, and their appearances cannot be modified through this menu. However, on their respective profile pages, each of the four main agents has a skin setting, where alternative outfits can be unlocked by purchasing DLC.
GROUND
Training soldiers here yields experience points and temporary stat boosts to enhance their capabilities. Each squad member possesses a unique skill and an overall skill level, I’ll break those down later.
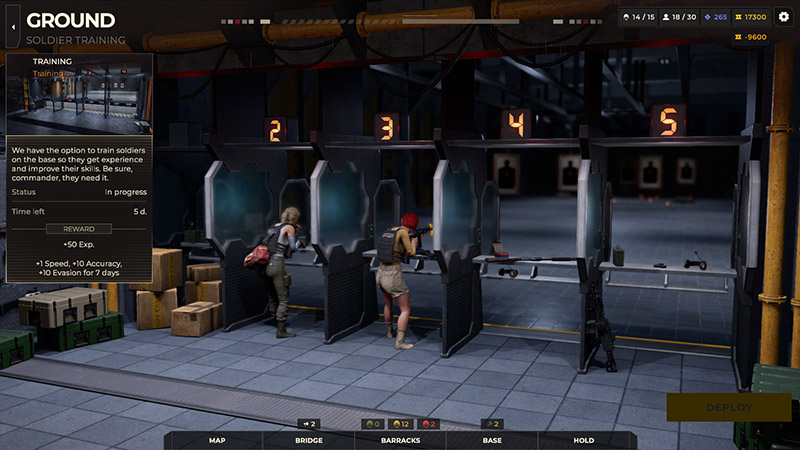
During my playthrough, I rarely used the Training Ground, as taking on combat missions seemed to level up troops much faster. However, this is just a personal observation—I haven’t actually compared the precise XP values between the two.
HOSPITAL
The Hospital is a core facility prioritized in the main story, primarily used to treat severely wounded operatives.
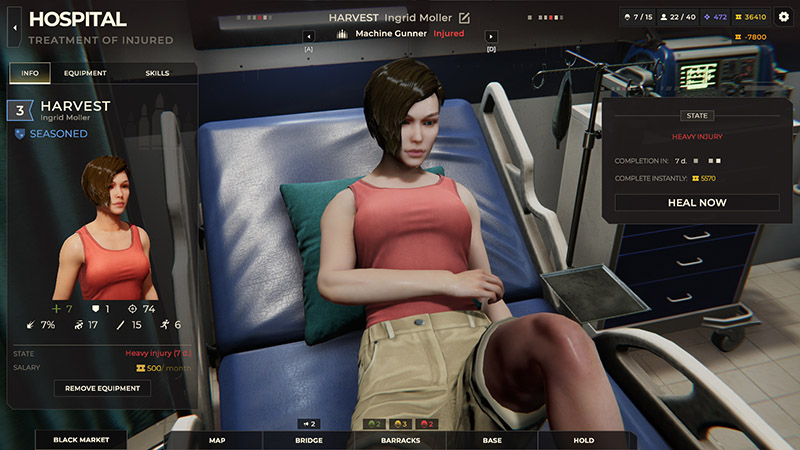
If an agent is knocked down in combat but not killed outright, they can survive if revived by a squadmate in time—though they will be left in a critically injured state. After the mission, the operative is automatically transferred to the Hospital for recovery and remains unavailable for any tasks until fully healed.
If an operative dies during combat, the Hospital cannot save them—you will lose that agent permanently.
SALOON
The Saloon sounds like a fluff building, but it’s not.
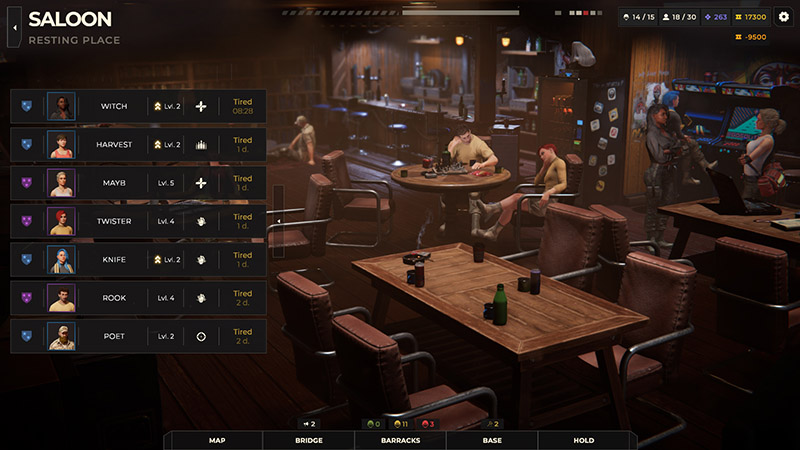
It serves not only as a place for operatives to relax and socialize between missions, but also boosts squad efficiency—cutting rest time by 30% to get fatigued mercs back into action faster so you’re not short-handed when things get busy.
Additionally, building the Saloon unlocks the Gaming Machine, giving your operatives a new way to unwind at the bar.
BASE
All base facilities are built here, including the Hospital, Saloon, Training Ground, and other constructible structures.
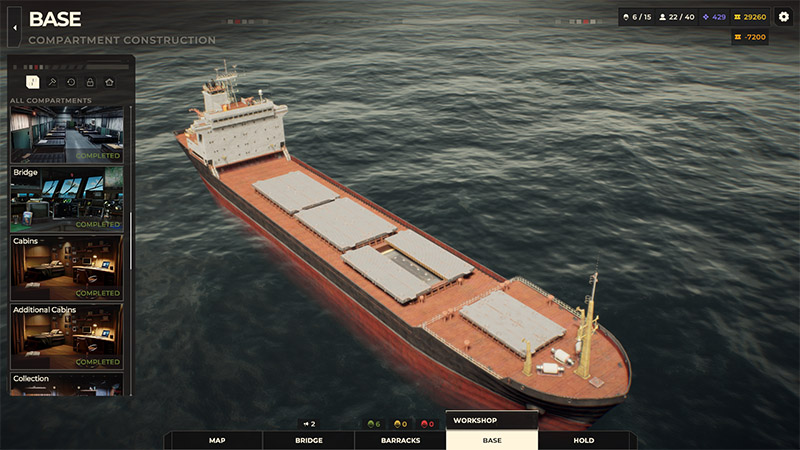
Additionally, this area houses the Workshop, where you can purchase tech items featured in contracts, such as drones.
HOLD
This is the Hold, where you can check owned gear and supplies or purchase contracted equipment and items directly—though you cannot sell goods here.
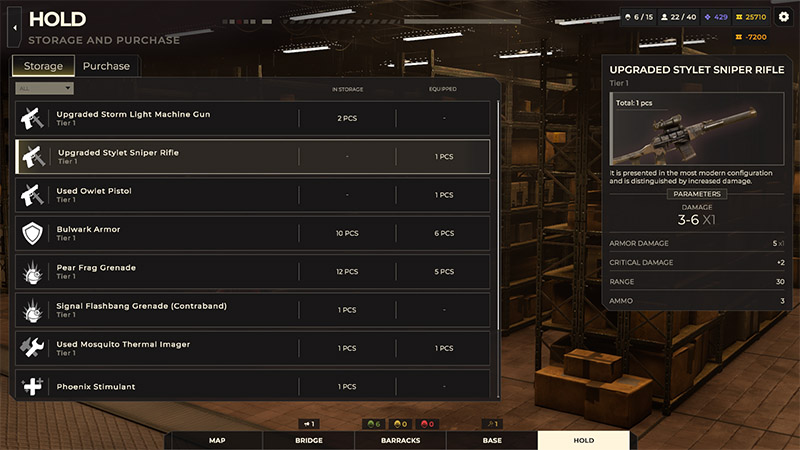
Any loot acquired after a battle has to be traded through randomly appearing merchants, as far as I can tell. This serves as one of your main income sources.
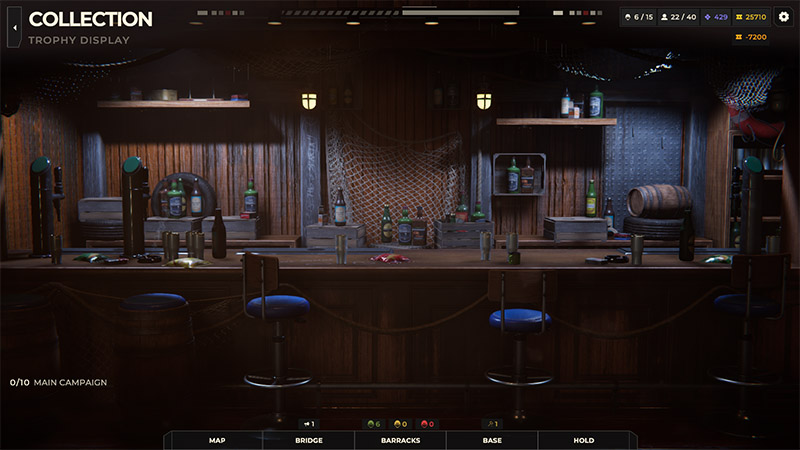
Additionally, the Hold features a Collection display case for showcasing achievements and other earned items, though I haven’t explored this feature much yet.
Dynamic Events
Warhounds is packed with engaging moral choices and random events, where every decision shapes your base’s growth and directly hits your operatives’ stats.
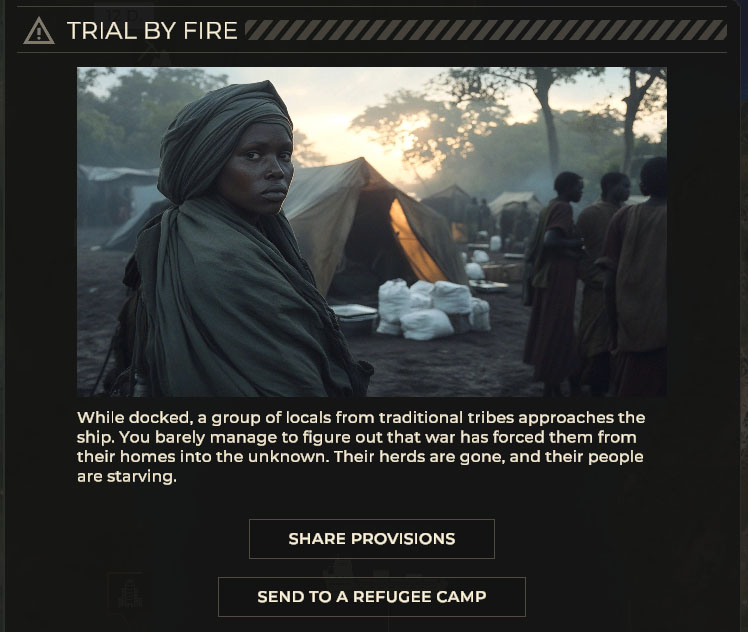
Take a dockside encounter with refugees, for instance. The prompt gives you two options: “Share Provisions” or “Send to a Refugee Camp.” Naturally, I didn’t hesitate to share supplies—only for the game to slap my team with a 7-day crit chance penalty alongside a 700-cash loss. Talk about painful.
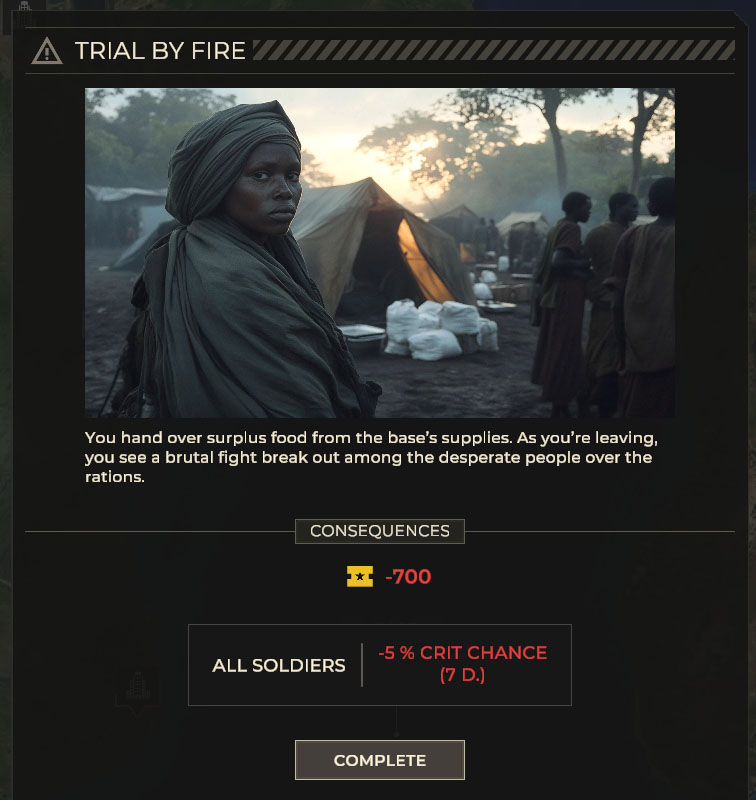
Then again, it makes tactical sense. Giving away limited stock starves your own base of resources. Maybe rerouting them to a refugee camp was the smarter call all along? The outcome remains a mystery, so I’ll just have to test that theory on the next run.
The game is full of these trade-offs:
- Do you adopt a stray cat wandering into camp?
- Do you pay up when an operative gets taken hostage?
- Do you buy out a shady informant who claims to have insider intel?
- Do you let an agent go home when family trouble hits?
These random tough calls are what keep the game from getting stale.
Mission Debrief
This was originally meant to be a straight review, but it somehow morphed into a guide along the way. Warhounds is packed with so many mechanics that I just wanted to share everything I’ve experienced so far—hopefully, it gives you a solid head start. I haven’t finished the campaign yet, but I’ll keep pushing through when time permits.
As I said at the start, the game itself is really solid, even if it’s not for everyone. That said, if you’re a fan of this genre, it’s definitely worth adding to your collection.
Note: Everything here is based on my own playthrough and personal interpretation. For definitive mechanics, always refer to the game itself.
About the Author