Video sourced from the GAMEAY YouTube channel. © 2026 Mstudio.
At first glance, Little Stronger presents itself as a simple 2D top-down pixel RPG. Once you actually get your hands on it, though, you quickly discover a surprisingly engaging core loop with plenty of charm.
Based on my playthrough, a complete run takes roughly two to three hours, depending on how quickly you grasp the mechanics—some of which have a massive impact on your pacing.
The game is currently in Early Access, and while an official release date hasn’t been announced yet, its Steam page is live. It’s not available for purchase just yet, but you can add it to your Wishlist to get notified about future updates and the launch.
Nostalgic Vibes and the Core Loop
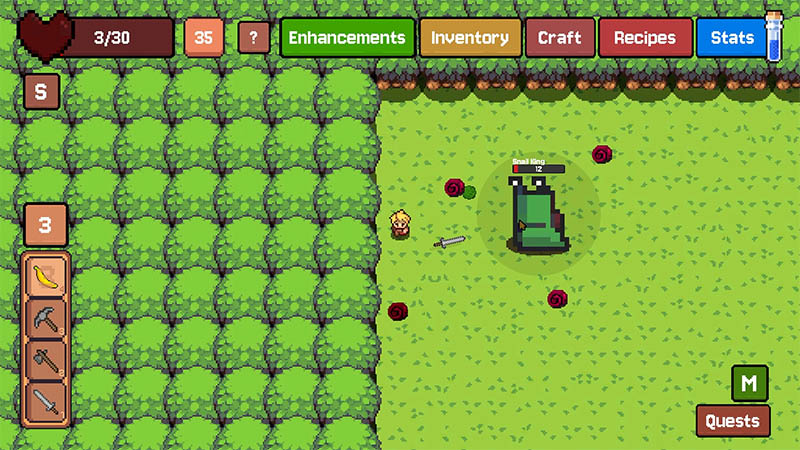
Little Stronger leans heavily into a nostalgic, retro pixel-art aesthetic. You play as an adventurer summoned to take down the King of Evil. Getting to him, however, is no walk in the park. Before taking on the final boss, you’ll need to defeat four key bosses across three distinct biomes: Slime-King, Snail-King, Dino-King, and The-Wizard.
Used under fair use for commentary, criticism, and educational purposes.
Each boss demands a specific gear set and stat build. You’ll have to gather materials and craft tailored equipment before stepping into the arena. Victory is far from guaranteed, and you should expect to fail a few attempts along the way.
These bosses are spread across three distinct biomes, each featuring its own unique environment, resource nodes, and enemy types.
Combat & Progression: A Unique Twist on Attacking
The standout highlight of Little Stronger is its combat system. Instead of traditional melee slashes, your weapon orbits around your character as if guided by magic. You don’t need to click to attack—simply aim with your mouse, and the weapon automatically bounces back and forth between enemies and environmental resources.
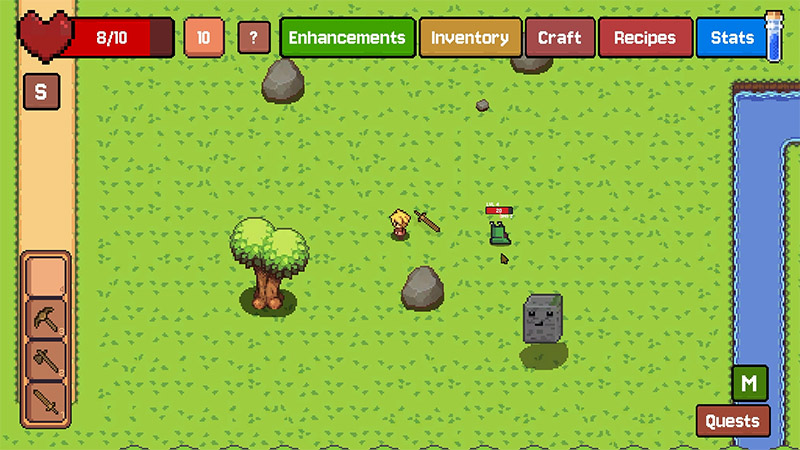
This setup fundamentally changes how you approach positioning. For example, sandwiching enemies between your character and the weapon’s trajectory drastically increases the bounce rate and your DPS. However, doing so comes with real risk: high-frequency bounces can drag monsters straight toward you, leading to quick damage or an instant death if you miscalculate. Investing points into Attack Range becomes a key risk-management strategy to give yourself breathing room.
When enemies cluster up just right, the weapon ricochets wildly between them, dealing massive burst damage. I triggered one of these chain bounces during the Slime-King fight, which unexpectedly melted its health bar in seconds and showcased the high skill ceiling this combat system offers.
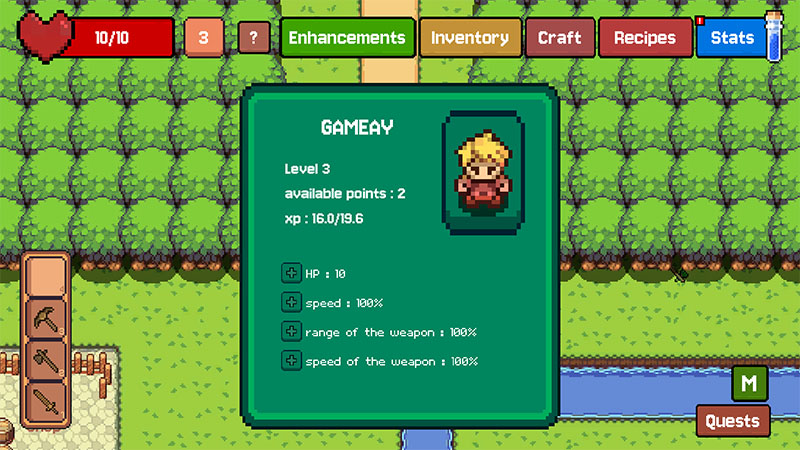
When leveling up, you manually allocate stat points into Attack Speed, Attack Range, Max HP, and Movement Speed. This allows you to tailor your build to whatever challenge a specific area presents.
Crafting & Gear Mechanics
Don’t let the phrasing fool you—”building” here refers to equipment crafting rather than home construction. Chopping trees, mining ores, and crafting gear form the backbone of the game. You’ll rely heavily on this loop for both standard mob clearing and boss encounters.
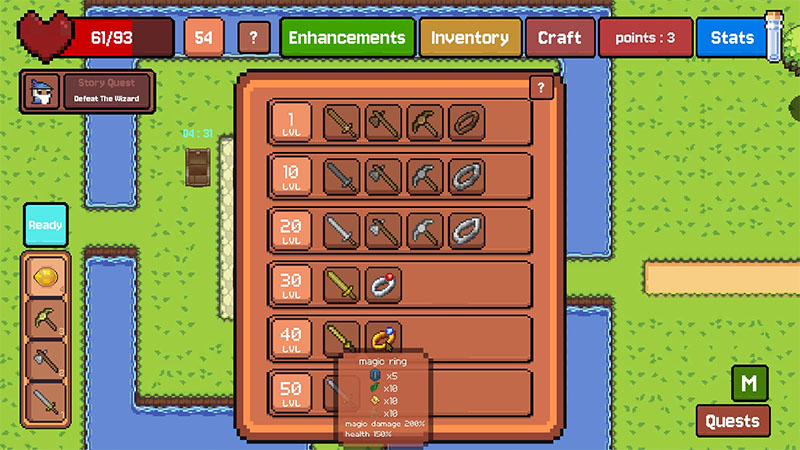
To craft higher-tier equipment, you first need to complete area-specific quests to earn points, which in turn unlock new crafting blueprints. Aside from your base stats, your character’s combat effectiveness relies almost entirely on your gear.
Stat bonuses from gear directly dictate how fast you can progress through content, and the bosses themselves pose a solid challenge. For instance, accessory rings provide passive stat boosts that make a noticeable difference in raw power. Furthermore, certain bosses are completely immune to physical attacks, forcing you to rely on magic skills instead. Stacking the right accessory attributes to boost magic damage becomes essential for turning a grueling fight into a manageable one.
The Real Challenge: Permadeath Risk & Storage
Grinding mobs and gathering resources is straightforward enough. The real challenge comes from the death penalty: if you die, everything in your main inventory vanishes permanently. Even if you play conservatively, a momentary lapse in concentration is bound to happen.
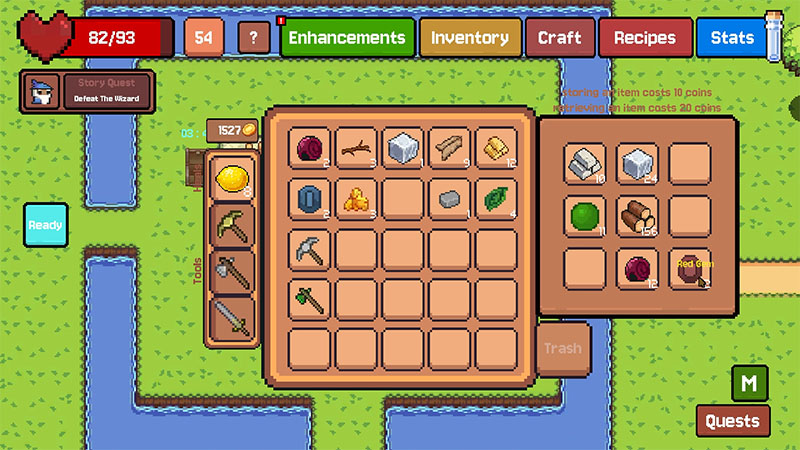
To mitigate this, the game provides a safe-zone stash box. However, depositing and retrieving items costs gold, and storage space is limited. It adds an interesting layer of resource management to your strategy while directly influencing your overall playtime.
Thankfully, while death wipes your inventory, the items equipped in your four main gear slots remain safe. Your accessory and skill slots are on separate sub-panels and are similarly immune to death penalties.
Biome Progression and Harvesting Tiers
The world is split into three biomes: the Green, Pink, and Yellow zones. Tools are tiered, meaning you need higher-grade tools to harvest woods and ores in later zones. Because you can’t harvest higher-tier resources early on, your crafting progression order is vital.
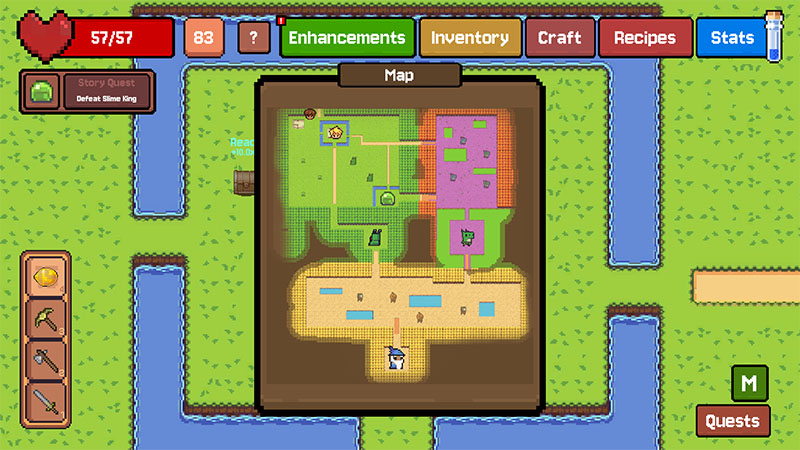
For example, trees and mineral nodes in the Pink Zone require stone tools, whereas the Yellow Zone demands iron tools. Each biome features different mineral types, distinct enemy spawns, and unique drops—all of which are required materials for advanced weapons and tools.
Boss Encounters and Combat Tactics
There are four regional bosses and one final boss in total, each featuring distinct mechanics and attack patterns. Defeating a boss rewards you with a unique skill that directly counters or complements the matchup against the next boss in line.
Boss skills can be leveled up to Level 5 to boost their damage output. Scaling your skills is virtually mandatory if you hope to defeat the final boss. The-Wizard, in particular, is entirely immune to physical damage—even a max-level sword won’t scratch it. Skills are your only option. I held off on fighting The-Wizard until I leveled my primary offensive skill to Level 4.
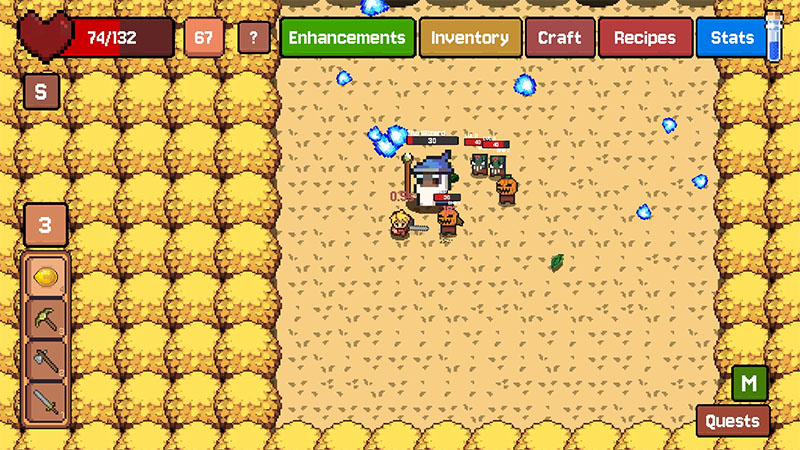
During that fight, I stumbled upon a high-risk tactic: hot-swapping between two rings mid-combat. One ring boosted Max HP and Physical Damage, while the other specialized in Skill Damage. I constantly swapped them back and forth to keep my health pool high while maximizing damage bursts. The downside is that the equipment pop-up window obstructs your vision and throws off your movement, making it very risky. However, this high-risk strategy fit my playstyle perfectly, allowing me to take down the boss in just a few short cycles.
Final Thoughts & Bug Report
During my preview session, I hit a minor bug where ring passive stat bonuses would randomly stop applying, requiring me to unequip and re-equip them to reset the effect. For an early-access build currently in active development, minor bugs like this are to be expected.
Overall, Little Stronger brings a very refreshing set of ideas to the table, particularly with its spin-attack combat system. For a game that looks compact on the surface, its ~3-hour runtime feels remarkably satisfying and offers a solid level of difficulty—especially in the boss fights.
It’s a neat little game with a solid core loop, and I look forward to seeing further balance passes and content polish as development continues.
Little Stronger is currently in Early Access. If you’re interested, you can check out the Steam page and follow for future updates: Add it to your Wishlist
Note: This article was written based on an Early Access Preview build. Content and mechanics in the final release version may vary.
About the Author