⚠️Content Warning: While the screenshots in this guide are safe, the embedded YouTube gameplay video contains violence, gore, and horror themes typical of the Resident Evil series. Viewer discretion is advised for the video content.
It’s finally here! Resident Evil 9: Requiem is officially out. Ready to dive in? We’re featuring the ultimate Part 1 walkthrough from MKIceAndFire—the go to channel for high-quality, no-commentary gameplay.
Note: For Part 2 of the walkthrough, please read our guide here: [Click to View]
Support the original creator: Visit MKIceAndFire’s YouTube Channel for more high quality gameplay.
Since the video is over 4 hours long, we’ve skipped the plot summary and focused strictly on marking the locations of key collectibles and items for your convenience.
Note: Clicking the timestamps will take you directly to the scene on YouTube (you will be redirected to the YouTube site).
Here are the key details we’ve compiled
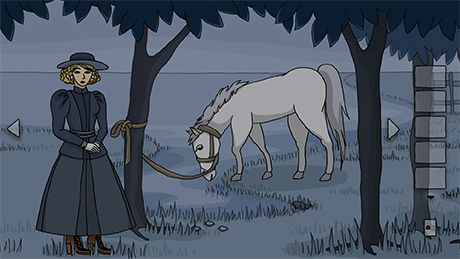
Grace’s Perspective:
Used for editorial and informational purposes only.
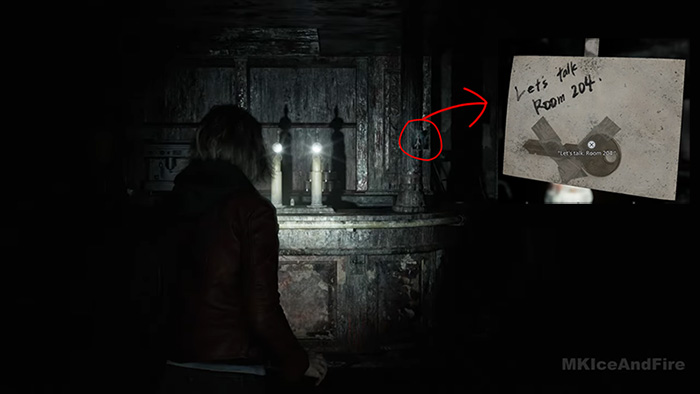
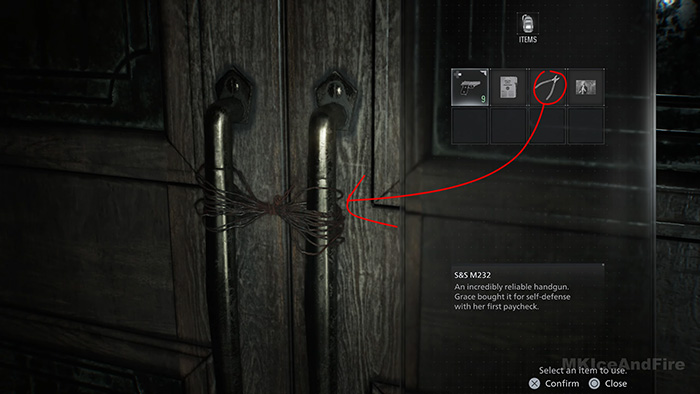
11:50 After entering the building, head to the room with the bar. Look for a photo of Grace on the pillar above the counter. Inspect the photo and flip it over to reveal a clue for Room 204 along with a Key.
Use this key to unlock the door on the right side of the bar.
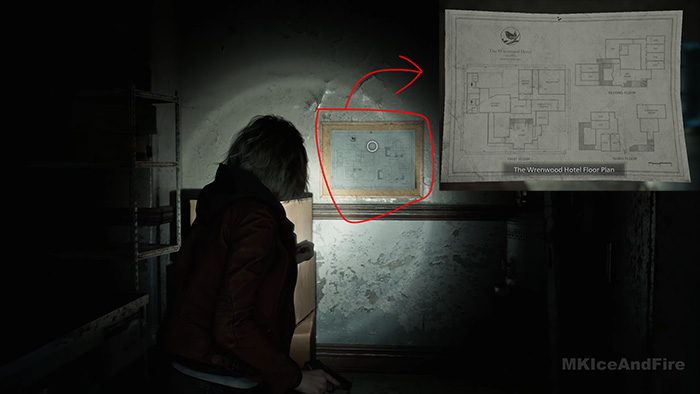
15:25 You’ll pick up a Map here. This is essential, as it reveals your current location and layout, making navigation much easier for the rest of the game.
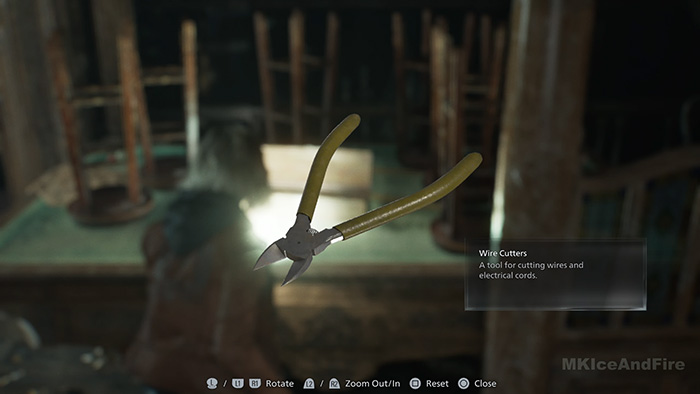
17:00 Grab the Wire Cutters here, you’ll need them shortly.
17:19 Use the Wire Cutters right here to snip the wire blocking the main gate.
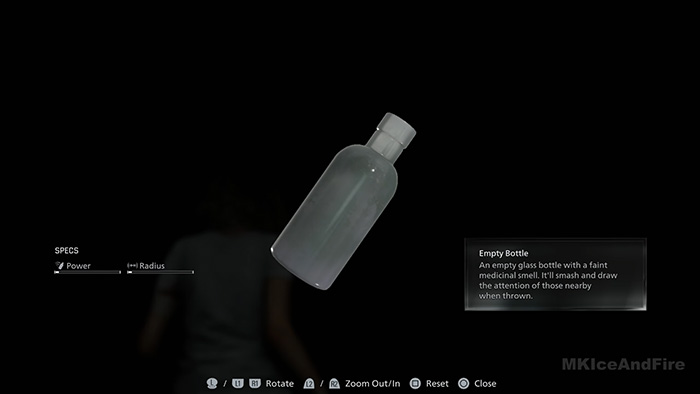
45:10 After leaving the blood extraction room, Grace proceeds down the hallway into a dark, lab-like room. Listen for the sound of rolling bottles; you can pick up an Empty Bottle from the floor.
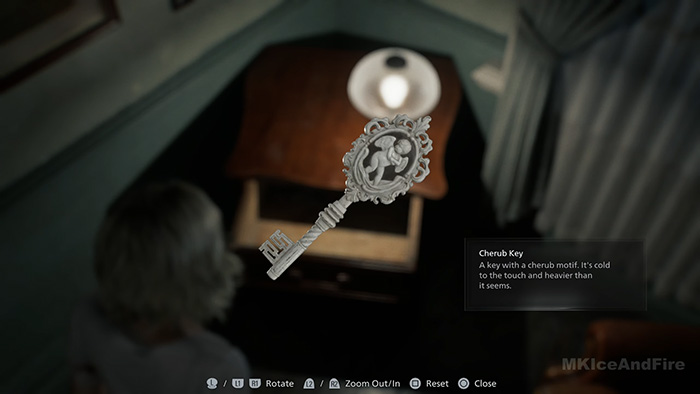
46:40 The elevator requires a Fuse, which you don’t have yet. Look to the left and open the drawer to find a Key with a Cherub on it.
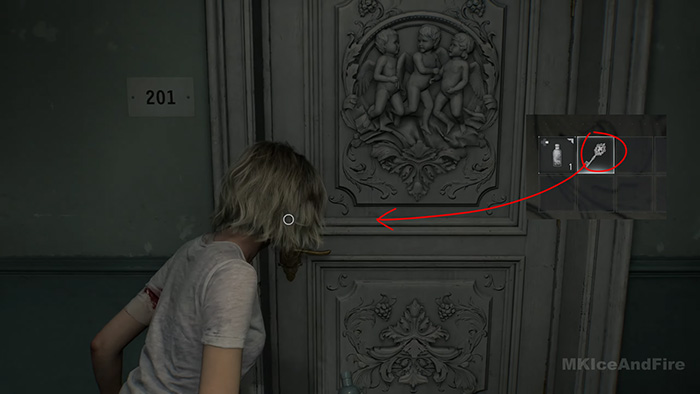
46:53 Return to the hallway and enter Room 201 (the door marked with three cherubs) using the key you just found. This room serves as a Safe House, featuring a typewriter for saving and various collectibles.
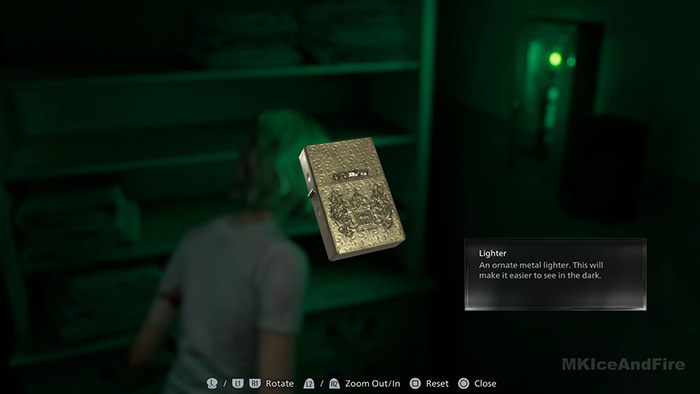
On the shelf in the room to the left of the bed, you’ll find a Lighter.
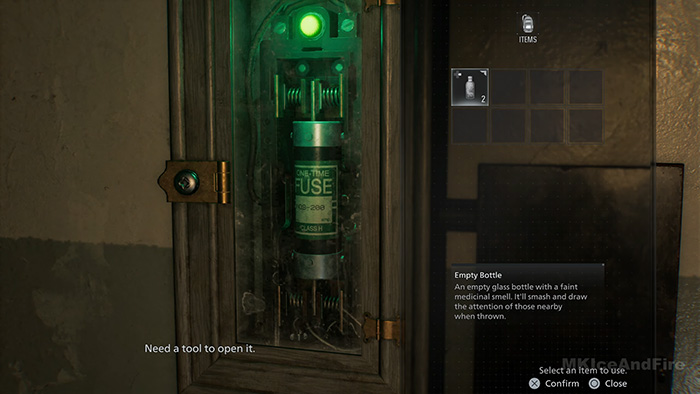
There is a Fuse on the wall next to the shelf, but you’ll need a tool to remove the screws.
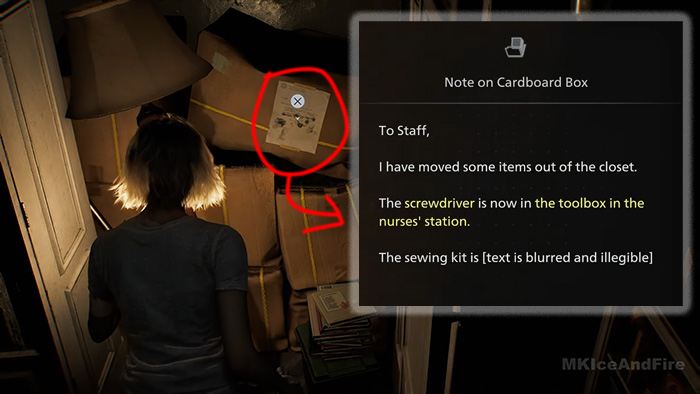
49:06 After leaving Room 201, head to the other room with the toys. Inside the closet, you’ll find a note revealing that the Screwdriver is located in the toolbox at the Nurses’ Station.
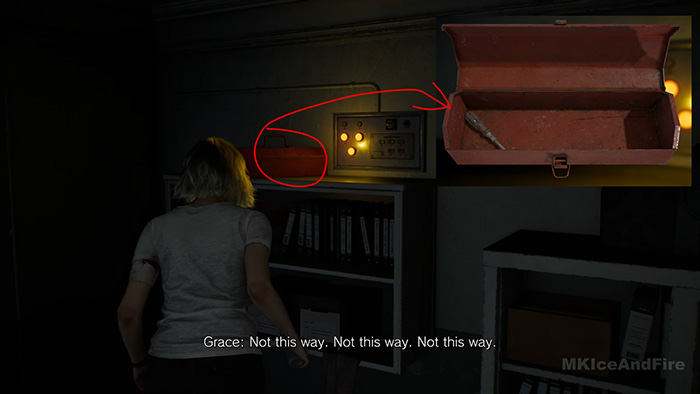
52:21 Head to the Nurses’ Station. On top of the shelf unit (look for the three orange lights), you’ll find a Toolbox. Open it to get the Screwdriver.
Now that you have the tool, head back to Room 201 (the door marked with cherubs). Use the Screwdriver to remove the screws and retrieve the Fuse. Then, take the Fuse to the elevator and install it.
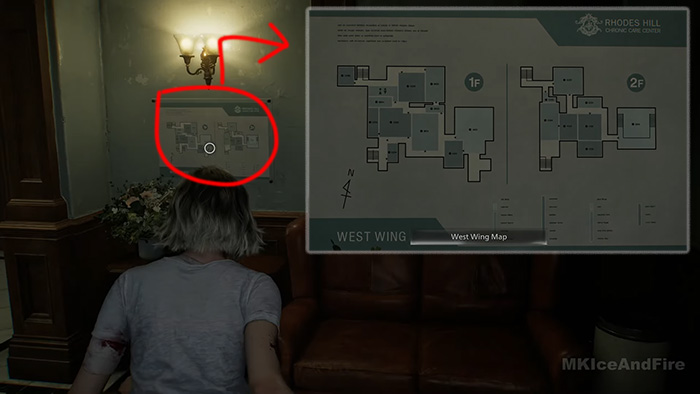
1:19:16 After Grace and Leon part ways, Grace must find a way to escape on her own. You can find the West Wing Map here.
1:20:57
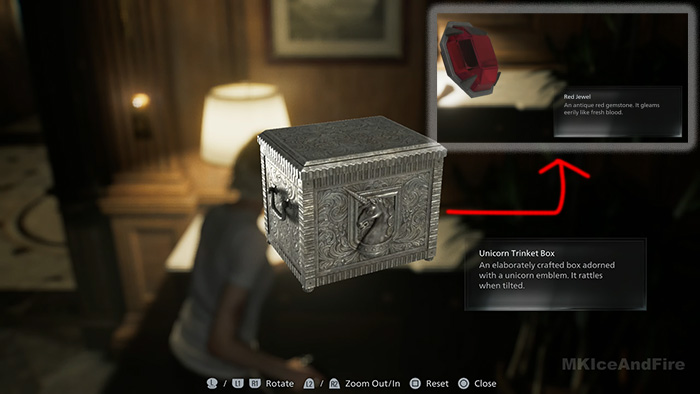
In the Chairman’s Office, you’ll find a Box. Inspect and open it to retrieve the Red Jewel.
In the other room of the office, you can find a Pencil.
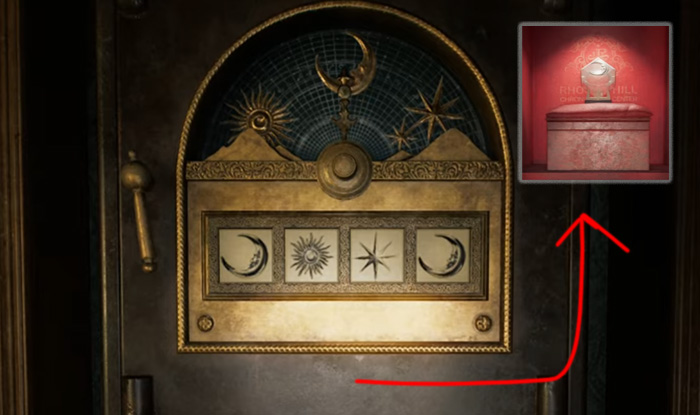
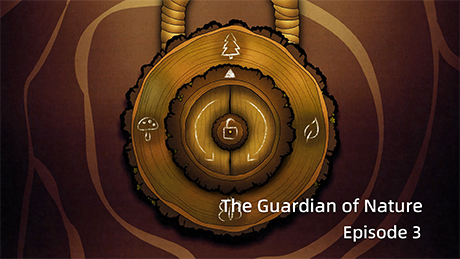
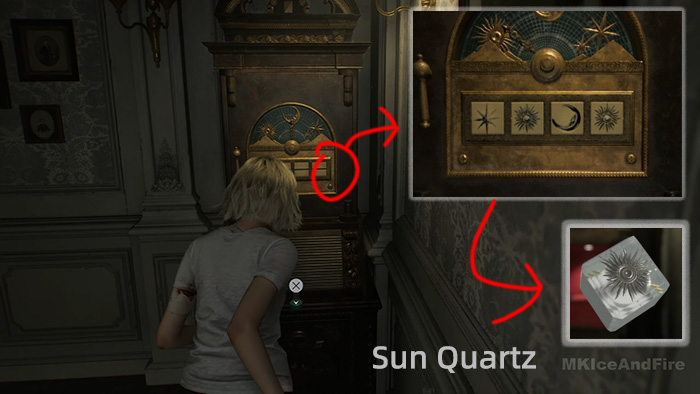
1:23:05 The safe in the Chairman’s Office requires a specific combination. Please refer to the image above for the code. Inside, you’ll find the Moon Quartz(the first one).
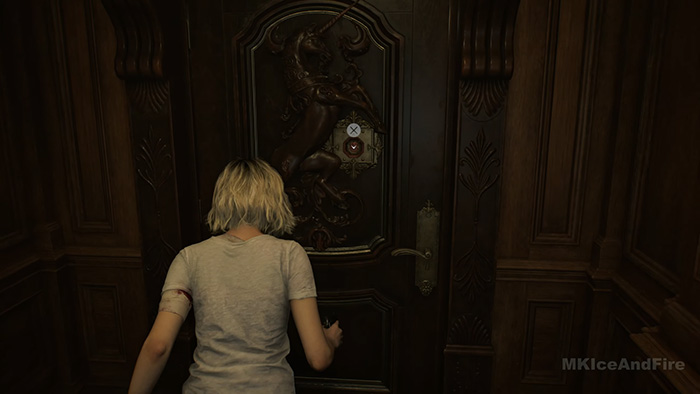
1:24:05 How to use the Red Jewel: Head to the Main Hall on the first floor. Enter the room marked with a Unicorn symbol.
This room contains various rewards, but accessing them requires spending your collected Coins.
Also in this room: Pick up the severed hand from the floor and inspect it to find the East Wing Keycard.
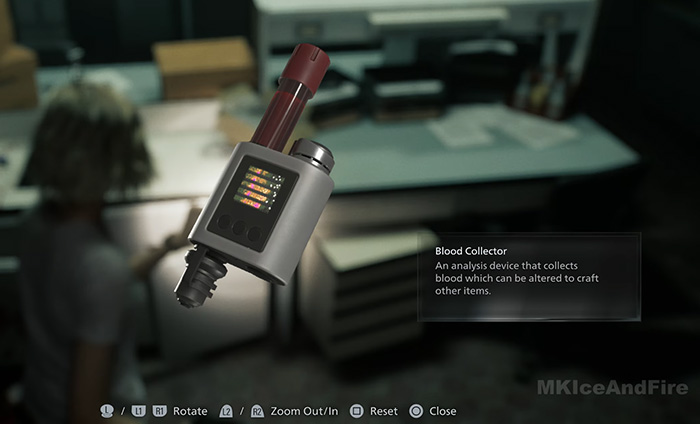
1:37:16 In this laboratory, Grace can obtain the Blood Collector.
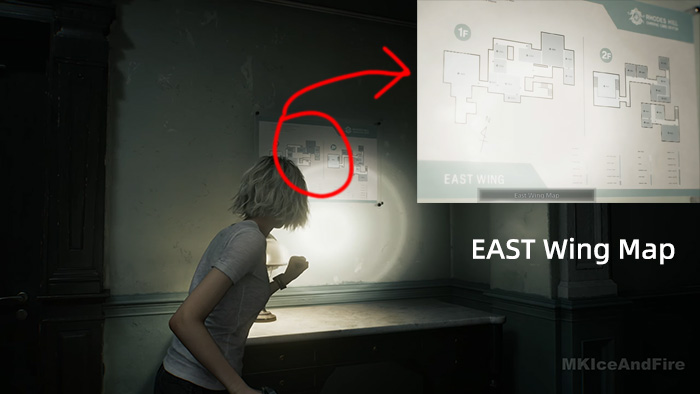
1:42:50 When you reach the upper floor, don’t enter the door just yet. First, make sure to pick up the East Wing Map.
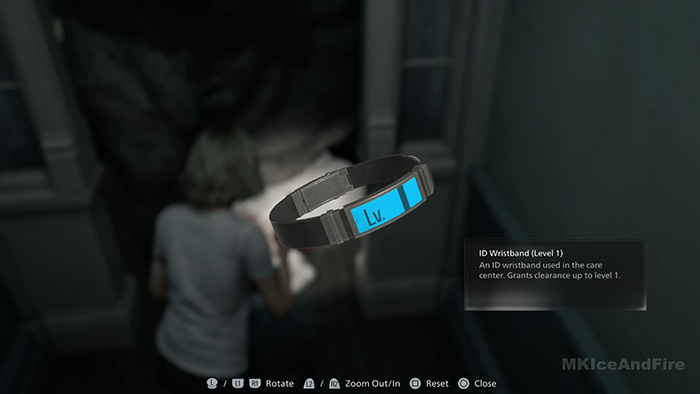
1:45:37 At the end of this hallway, you can obtain the Level 1 Wristband, but be prepared to encounter a “little cutie” along the way.
Use this Wristband to unlock security gates that were previously inaccessible.
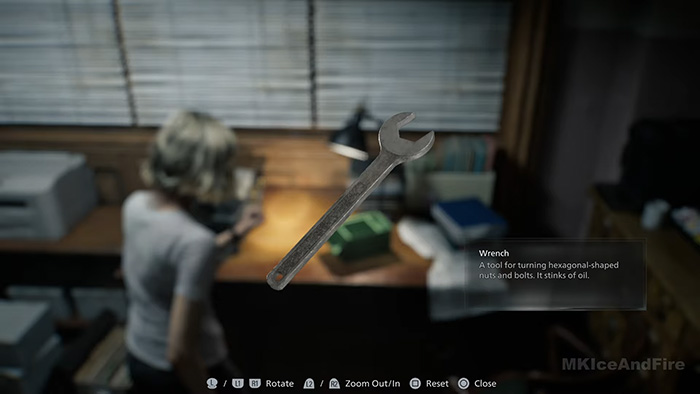
1:50:18 You can find a Wrench in this Safe Room. Be sure to pick it up, as you’ll need it for a later task.
2:06:11 Remember this broken wheel? Use the Wrench here to open the door.
This door leads to the Freezer Room. Grab the Artificial Heart inside, then head to the Laboratory to install it on the corpse.
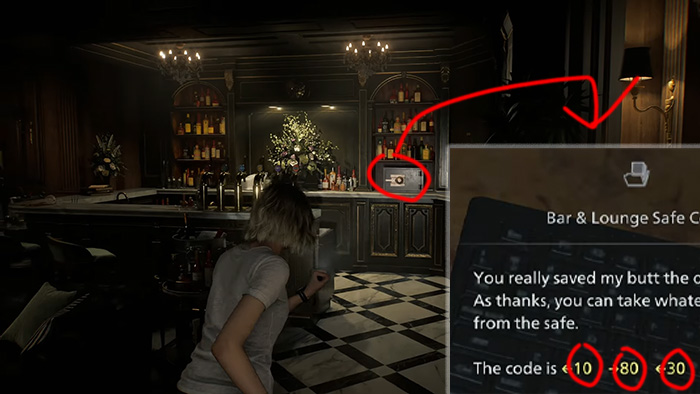
1:59:28 Bar Safe Code: 10 – 80 – 30. (Turn Left to 10, Right to 80, Left to 30). Inside the safe, you can collect 3 Coins.
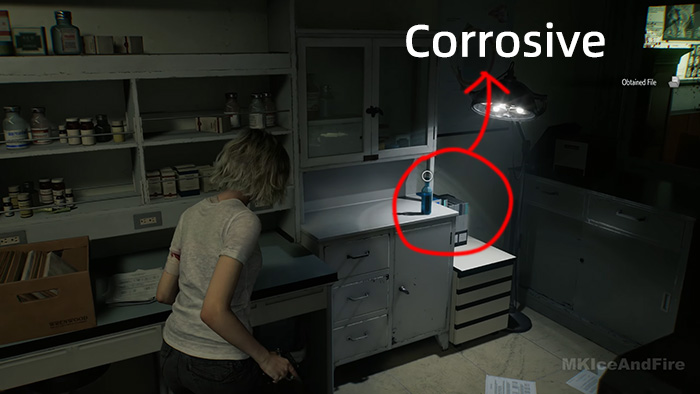
2:16:00 You can find the Corrosive on the table. Use it to melt locks that you can’t open otherwise.
2:20:11 After the cutscene with Victor, return to this room. Use the Corrosive here to break the lock, then open the safe to obtain the Sun Quartz (the second one).
The safe also contains a Note with instructions for the Cooler Box in the Underground Garage. Inside the box, you’ll find the Artificial Lungs.
Return to the Laboratory where you installed the heart. Install the Lungs on the corpse. The body will reanimate and attack—defeat it to obtain the Level 2 Wristband, which unlocks even more doors(For example: the Isolation Ward).
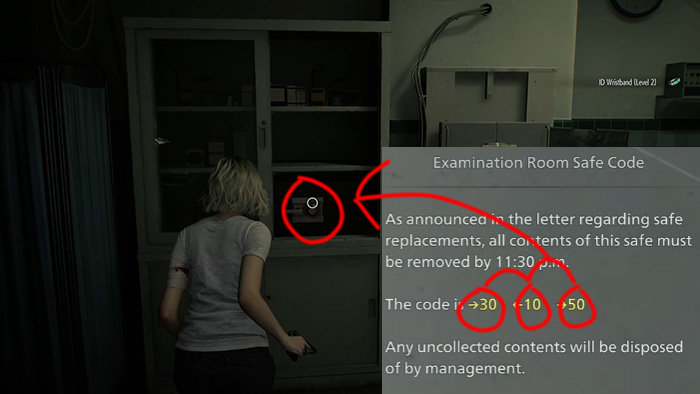
Don’t leave just yet! There’s another Safe here. The code is 30 – 10 – 50. Open it to find 3 Coins.
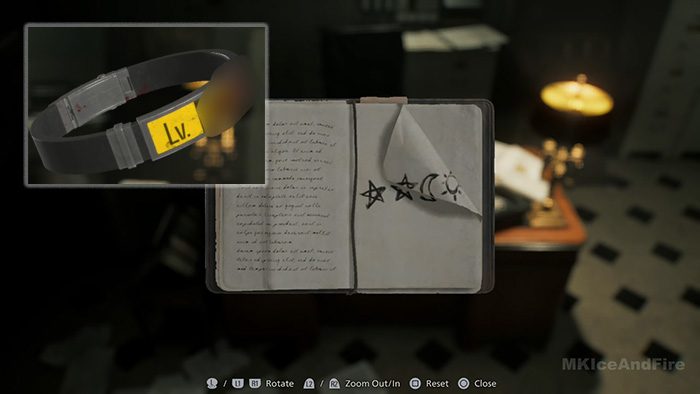
With the Level 2 Wristband, enter the Isolation Ward. Inside the Security Manager’s Office, grab the Level 3 Wristband and note down the Symbol Codes(don’t worry if you miss them, though!).
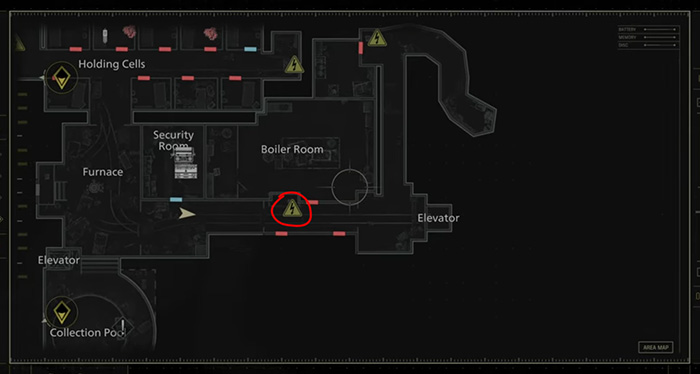
After the cutscene, Grace arrives at the hospital’s Underground Facility. The terrain here is complex and extremely dark, so expect this section to take some time.
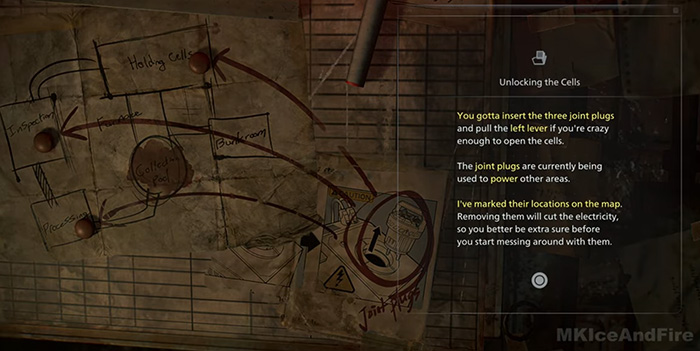
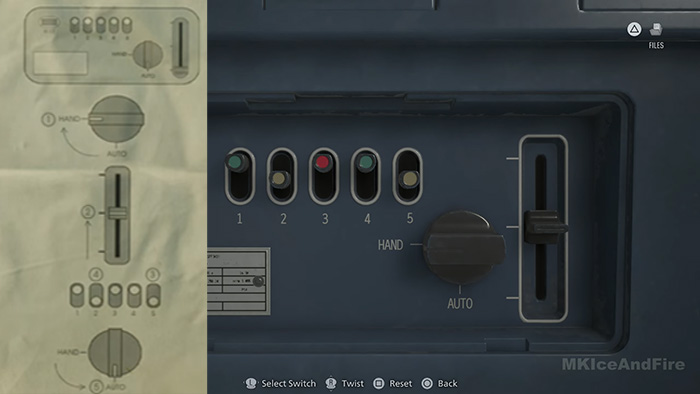
To restore power to the underground facility, you need to find three Joint Plugs.
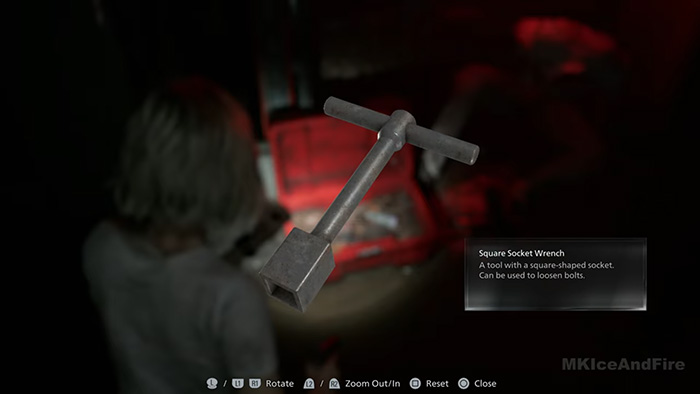
3:19:00 You can find the Square Socket Wrench in the Boiler Room.
Use the Square Socket Wrench here. It can also be used to unscrew the vents to access new areas.
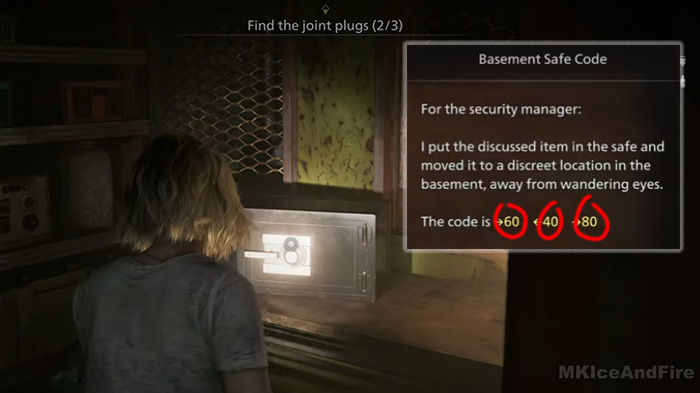
3:23:05 Found while playing as Leon. Simply open it using the code: 60 – 40 – 80.
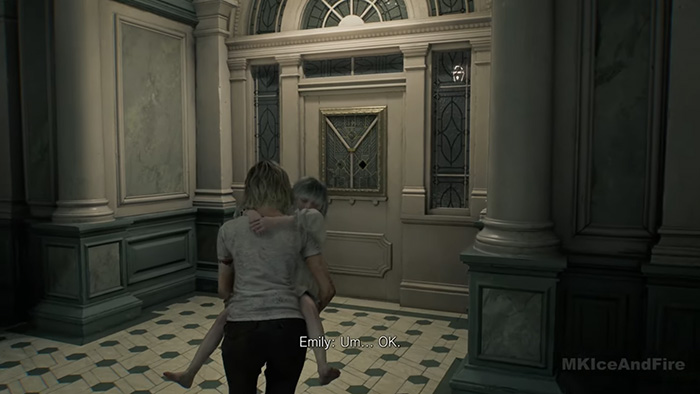
Once you have collected all three plugs, return to the control panel at 3:47:34. Insert them to restore power to the cells, then escape with Emily.
After the cutscene, you will obtain the Star Quartz (the third one).
Head directly to the Main Hall. Insert all three Quartzes to unlock the Exit Door.