For your convenience, the video is set to start from Episode 2 by default. If the timestamp is slightly off, you can manually drag the progress bar to 20:00, which is the exact start of the episode.
Just a quick heads-up: Episode 2 serves as a nice stepping stone. The puzzles are slightly trickier than in Episode 1, though not quite as intense as what awaits you in Episode 3. The main roadblock will likely be the Power Dial puzzle. But don’t worry—I’ll break it down and guide you through it step-by-step below!
More Episodes
Episode 1:The Guardian of Nature Episode 1 Full Puzzle Walkthrough
Episode 3:The Guardian of Nature Episode 3: Wooden Door Puzzle Solution
Episode 2 Walkthrough
Used under fair use for commentary, criticism, and educational purposes.
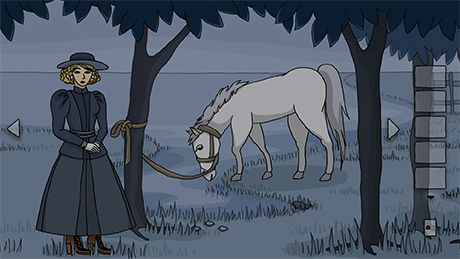
Once inside Episode 2, head right to find the first item—a branch. Pick it up for your inventory; you’ll need it later.
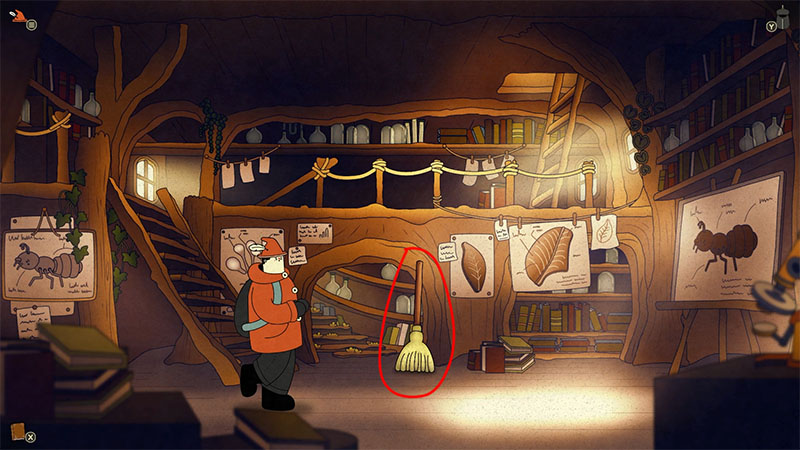
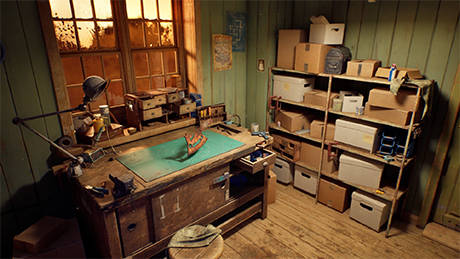
Move forward into the research lab, where you’ll find a broom. Pick it up, as it will be used later on.
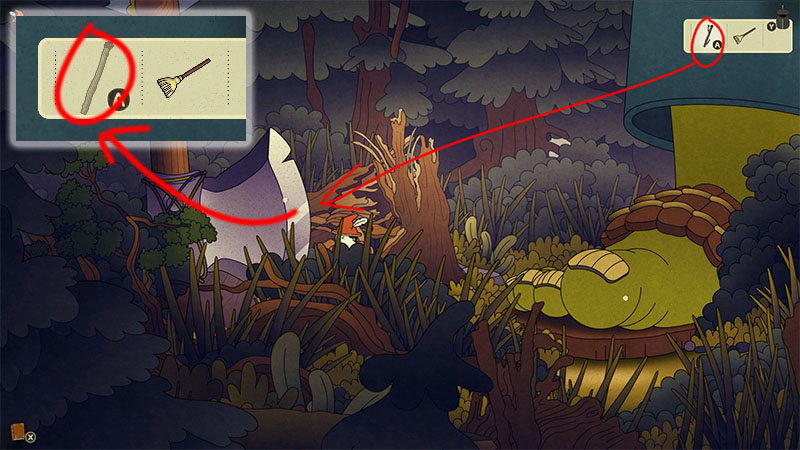
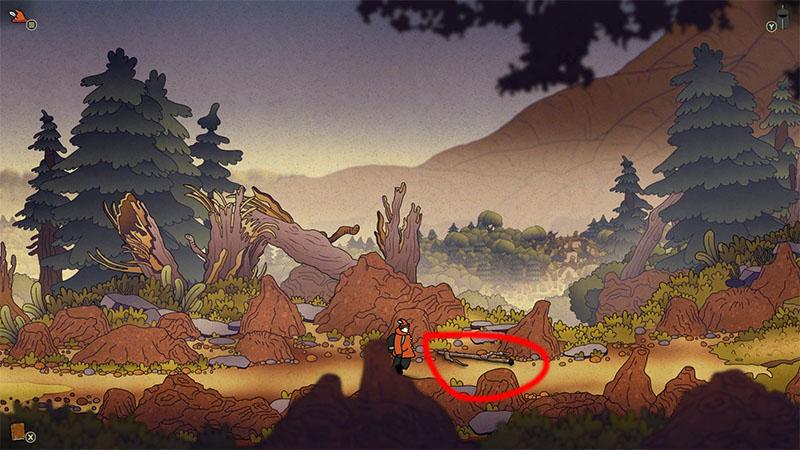
Head over to the giant axe area. Use the branch on the blade to trim off the twigs, and you’ll get a straight stick.
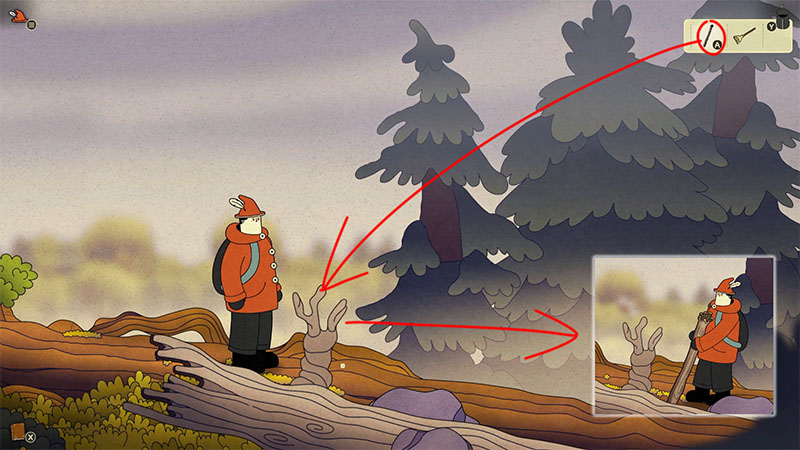
Use the stick in this scene to pry up the broken tree, and you’ll rescue the mole trapped underneath.
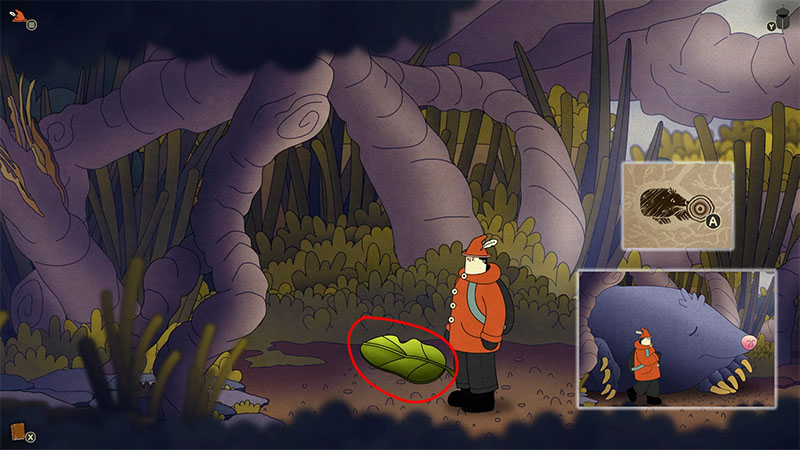
Where the mole used to be, you’ll find a green leaf. Pick it up and add it to your inventory.
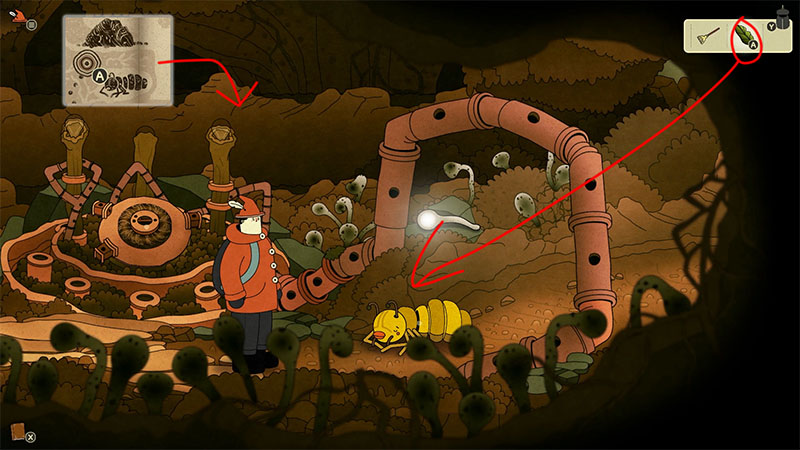
Take the green leaf to the ant nest and feed it to the ant. It will then wander off, clearing the path that was previously blocked.
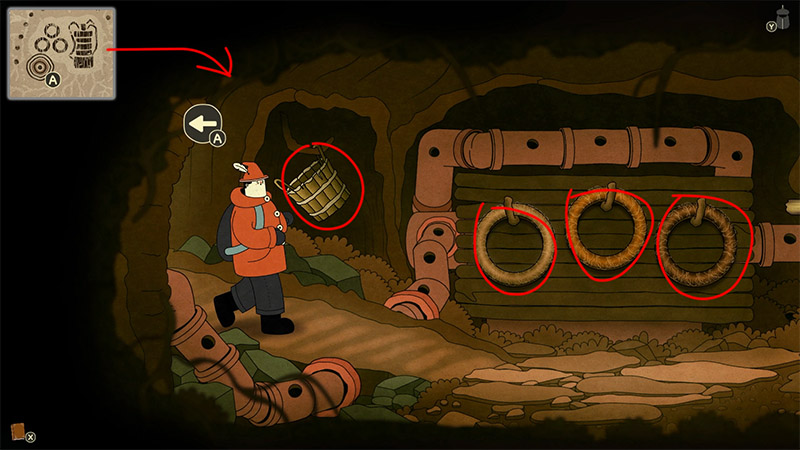
Head through the ant nest into a spacious room where you can collect four items: a wooden barrel and three wire coils.
The barrel is used for gathering ant eggs, while the three coils are for restoring power. Let’s break it down step-by-step below.
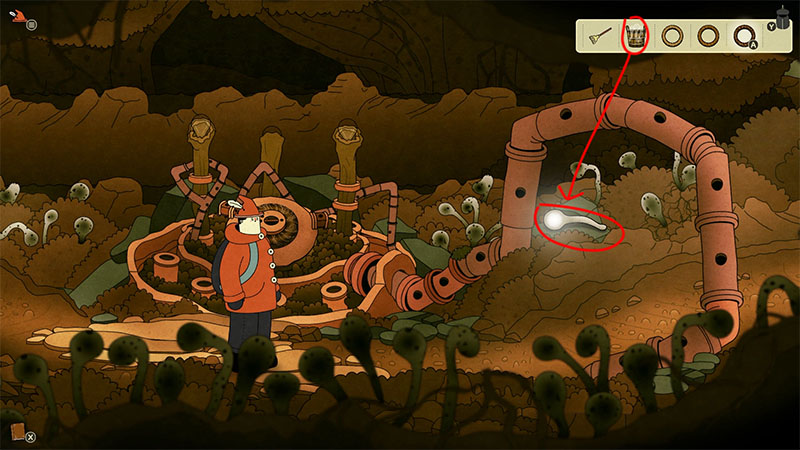
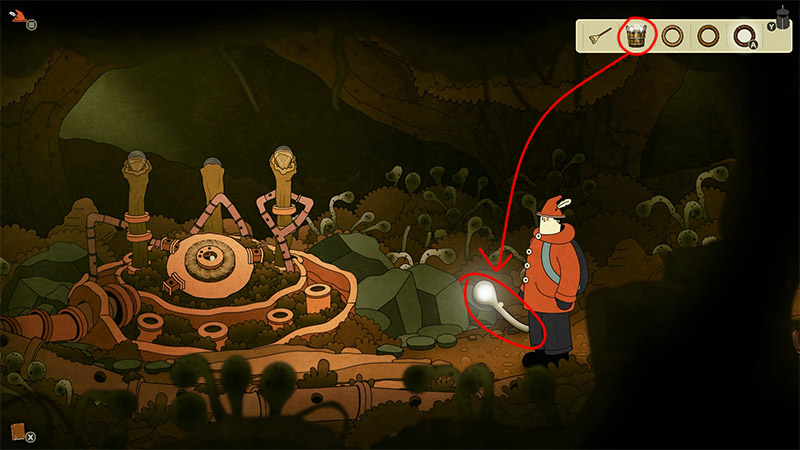
Here, you can collect the first ant egg. Although there is a power mechanism right next to it, you can’t interact with it just yet since the power is still out.
Make sure to deliver all the ant eggs (3 in total) first. Once that’s done, you can come back here to turn the power on.
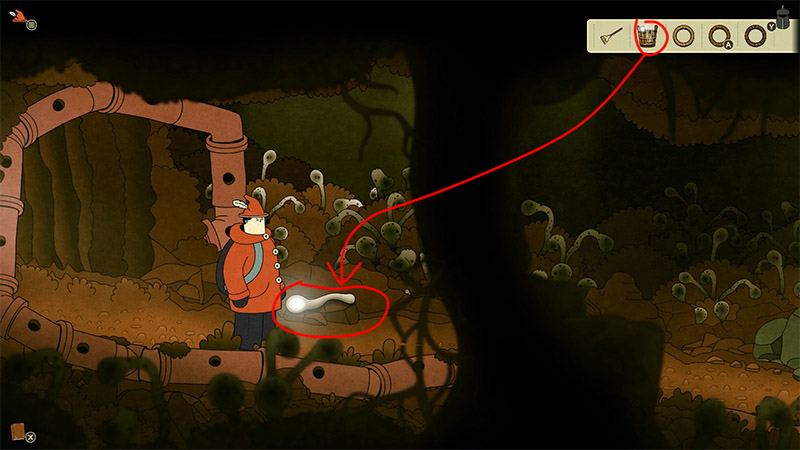
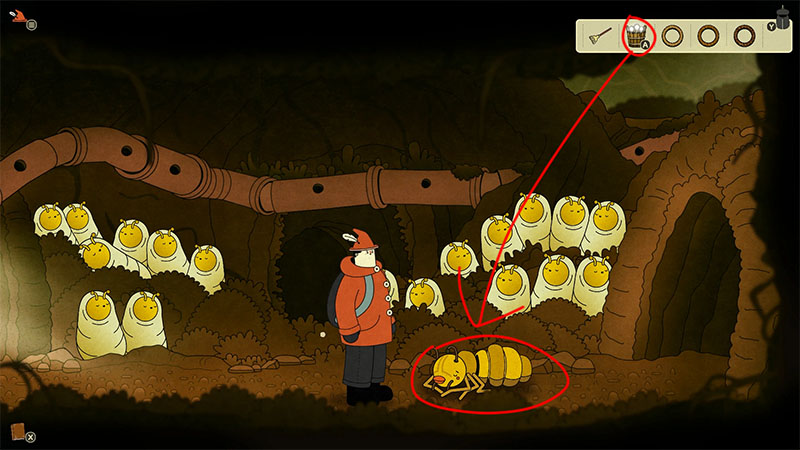
As shown in the image above, this is where you can pick up the second ant egg. It’s very easy to spot—just follow the path forward.
Here is the third ant egg, and there’s another power mechanism here too. We’ll come back to set it up later.
Hand over all three ant eggs to the mother ant, and the ant blocking your way will leave. With the path now clear, simply head to the right.
After delivering all the ant eggs, head over to the cliff edge. Use the broom here to lower the rope ladder, and you can climb right up.
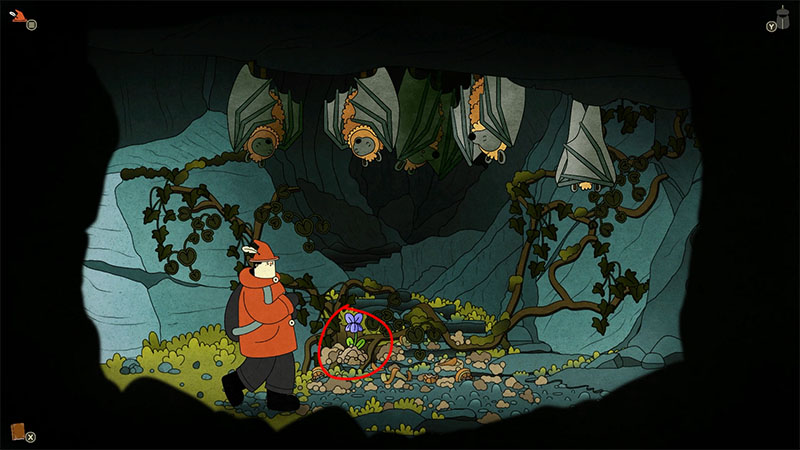
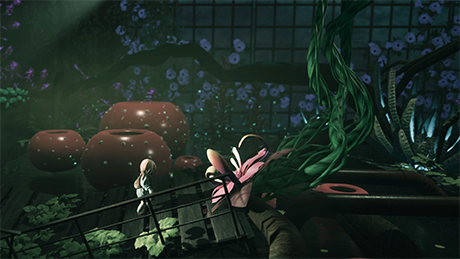
Enter the bat cave, where you’ll find a purple flower on the ground. Pick it up, as we’ll be using it in a bit.

Head deeper into the cave, and you’ll find a dead battery. Remove it and add it to your inventory; you can head back here once it’s fully charged.
Next up, we’re going to tackle the charging mechanism, so follow along with this guide to see how it’s done!
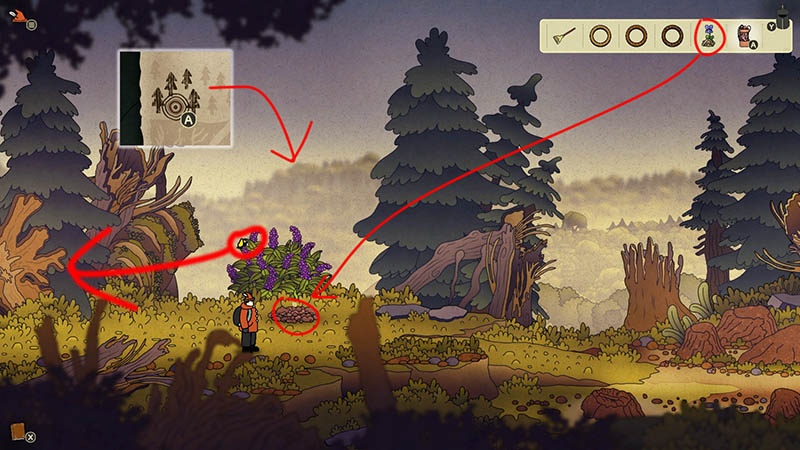
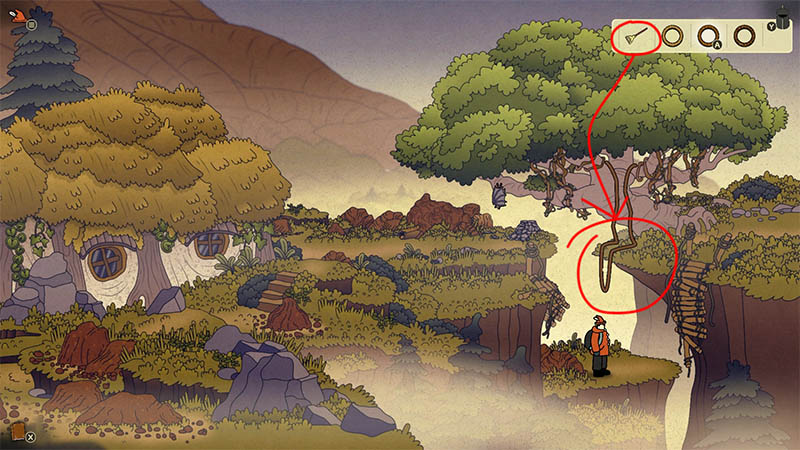
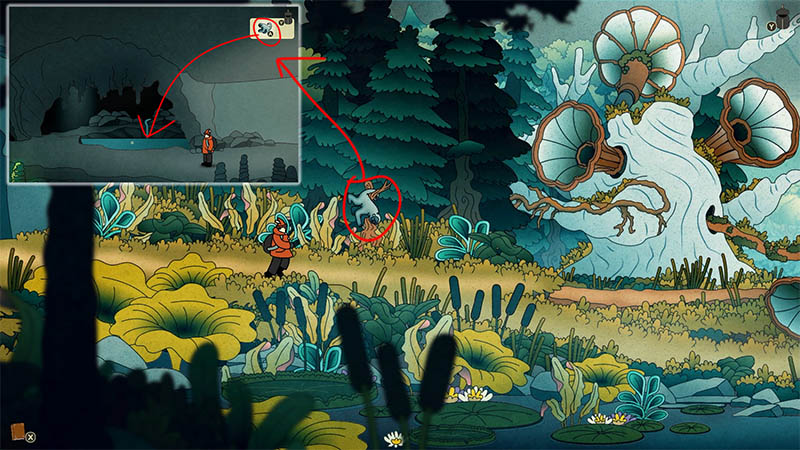
Return to this spot in the forest—just teleport straight here as shown in the image.
Plant the purple flower in the ground, and it will attract the nearby butterfly.
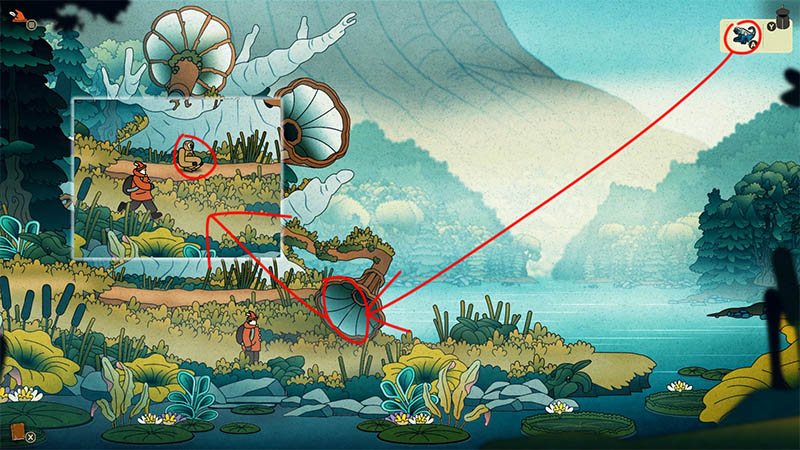
Next, guide the butterfly over to the giant head scene, which is the exact same place where you used the stick to pry up the tree and rescue the mole.
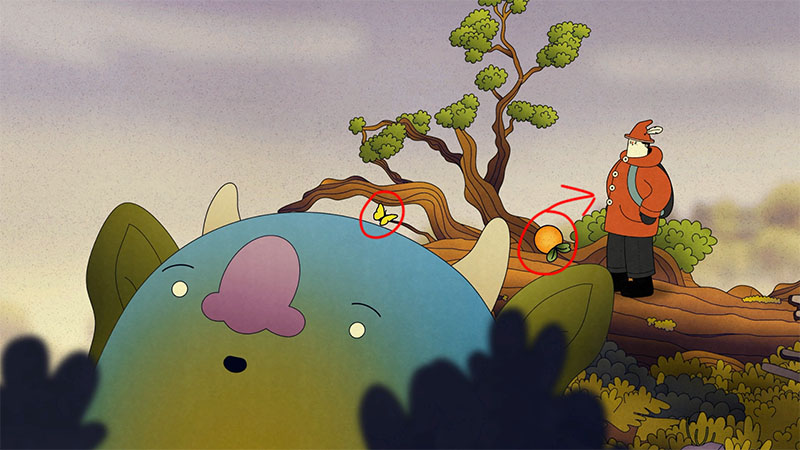
Leading the butterfly here will make the giant sneeze, which drops a fruit onto the ground. Just pick it up for later.
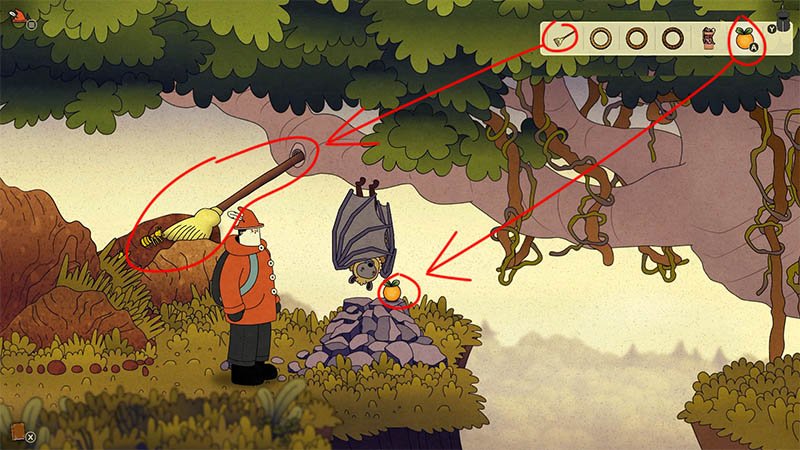
Remember that bat? There’s a pile of stones on the ground—place the fruit on it to attract the bat over.
Next, set the broom by the tree trunk as shown in the picture, which will lure the ants out of their hole.
Alright, now onto the main event! Since the ants have left their hole, we can finally start installing the power mechanisms.
Note: There are 3 power mechanisms in total, each corresponding to one of the 3 wire coils. If something feels off when you’re turning them, you can always swap out the coils and try again.
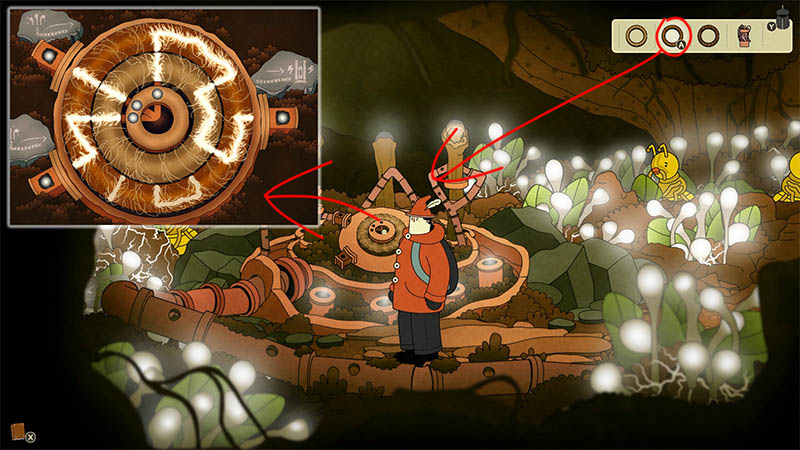
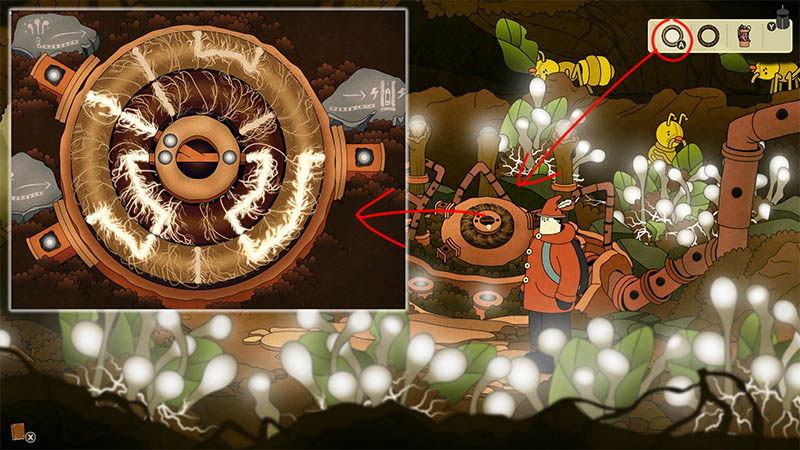
Next, follow the screenshot to install the middle coil, then rotate and connect it along the path shown in the image to complete the assembly of the first mechanism.
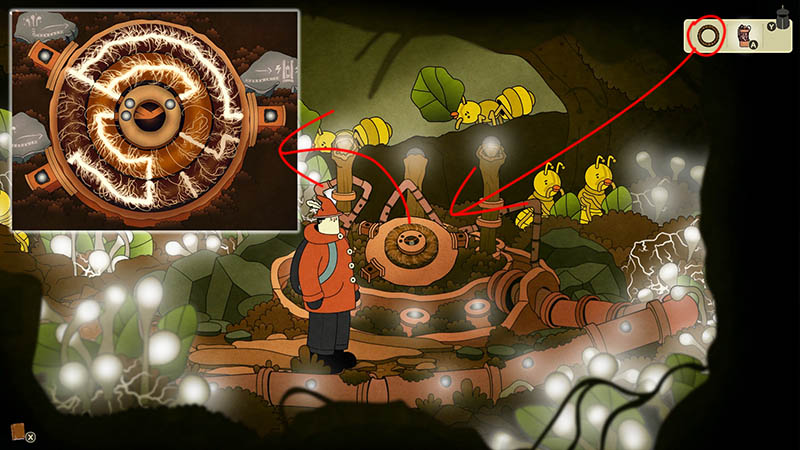
Next up is the second power mechanism.
Follow the image to install the leftmost wire coil, then rotate it to the corresponding path to connect the power.
We’ve finally made it to the third power mechanism! Install the very last wire coil and rotate it along the path shown in the image. With this final move, the entire electrical circuit is officially fully restored!
Now that the power is back on, let’s head back to the cave where we got the wooden barrel and the three wire coils.
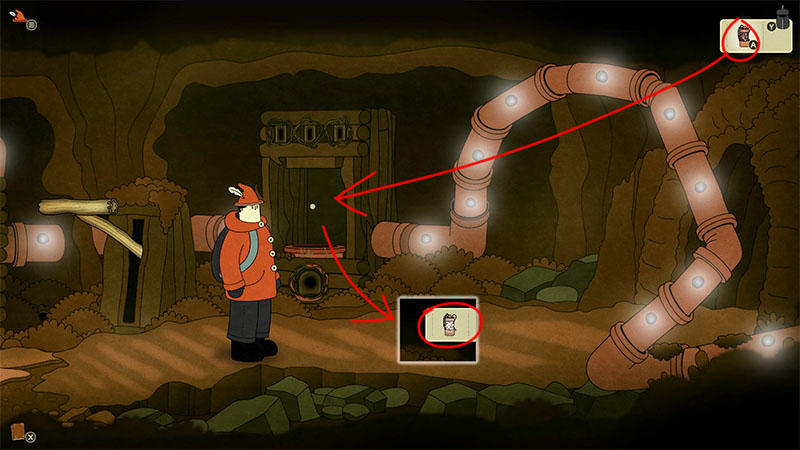
Place the battery from the bat cave onto the charging mechanism.
Pull the lever to charge it to full, then simply remove the fully charged battery for later use.

Teleport straight to the bat cave and put the battery in. The path will light up, allowing you to move forward.
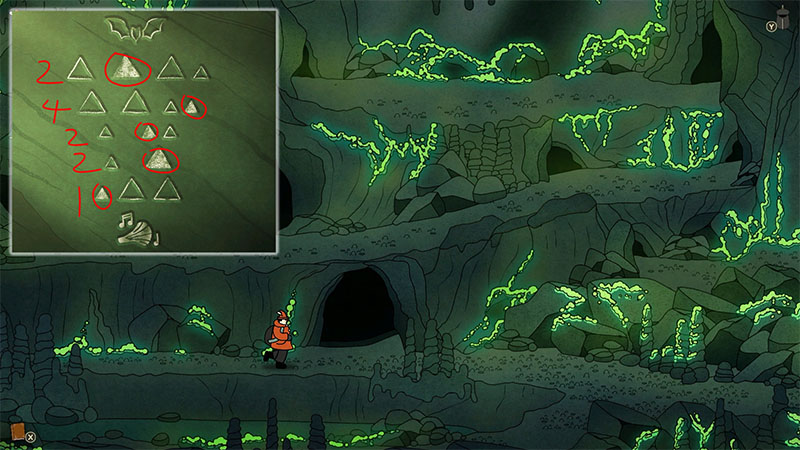
Note: This part is a bit tricky, so make sure to remember the correct entrance for each floor. If you make a mistake, you’ll have to start all over again.
Please refer to the locations in the image below:
- Floor 1: Door 2
- Floor 2: Door 4
- Floor 3: Door 2
- Floor 4: Door 2
- Floor 5: Door 1
Quick Cheat Sheet: Just remember the door sequence: 2-4-2-2-1.
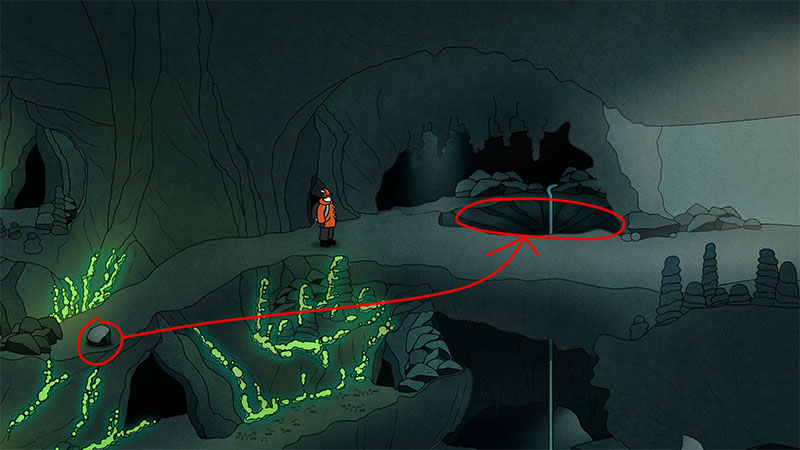
After exiting the cave, keep an eye out for a stone in the bottom-left corner. Pick it up and place it over the stream in the top-right corner to block the water, which will form a pool here.
We’ve now arrived at the final scene of Episode 2.
Pick up the gorilla call simulator, then head back to the pool we formed earlier with the stone. Fill it with water before bringing it back here.
Use the water-filled call simulator at the megaphone to attract the gorilla over. After that, talk to it directly to trigger the cutscene that connects to Episode 3.
And with that, Episode 2 officially comes to an end!
Note: These steps may seem brief on paper, but the accompanying screenshots will show you exactly what to do. If you’re having trouble finding something, try exploring the area or refer to the video tutorial at the top of this article for a clearer view.