The Guardian of Nature EP3: I’ve finally finished my full walkthrough for the grand finale! This episode definitely cranks up the puzzle difficulty, and even with in-game hints, the door codes and waveform tuning can easily leave you stumped on your first playthrough.
If you’re stuck, this guide cuts straight to the chase with exact puzzle solutions and step-by-step instructions to get you moving.
I’ve laid everything out in detailed screenshots below, but you can also jump straight into the full video walkthrough at the top of the page for a quick visual guide.
More Episodes
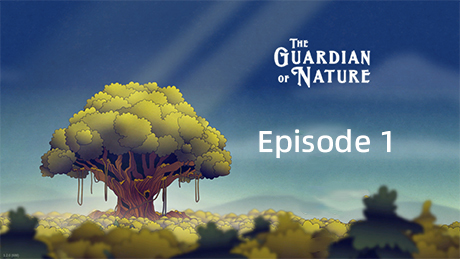
Episode 1:The Guardian of Nature Episode 1 Full Puzzle Walkthrough
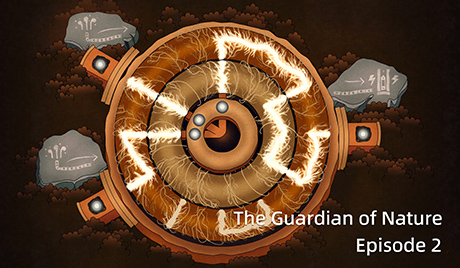
Episode 2:The Guardian of Nature Full Walkthrough: Episode 2 – Power Dial Puzzle Guide
Episode 3 Walkthrough
Used under fair use for commentary, criticism, and educational purposes.
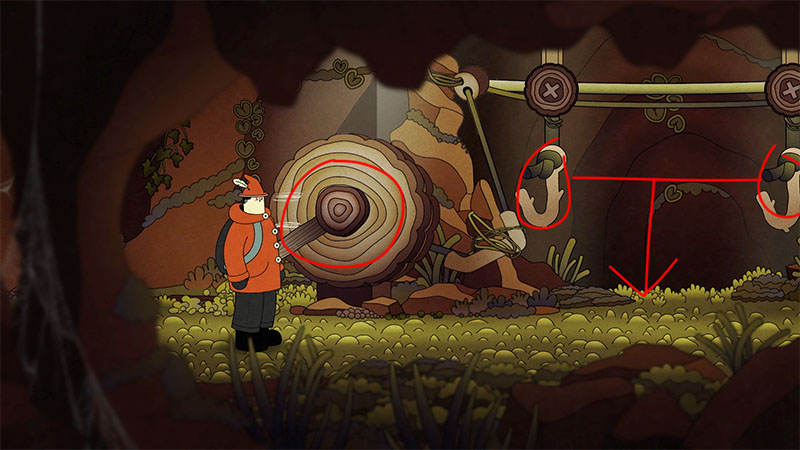
At the start of EP3, keep heading left. Once in this screen, pull the lever to lower the cable car hook.
After lowering the hook, head right into the room to find a key item: a dead battery.
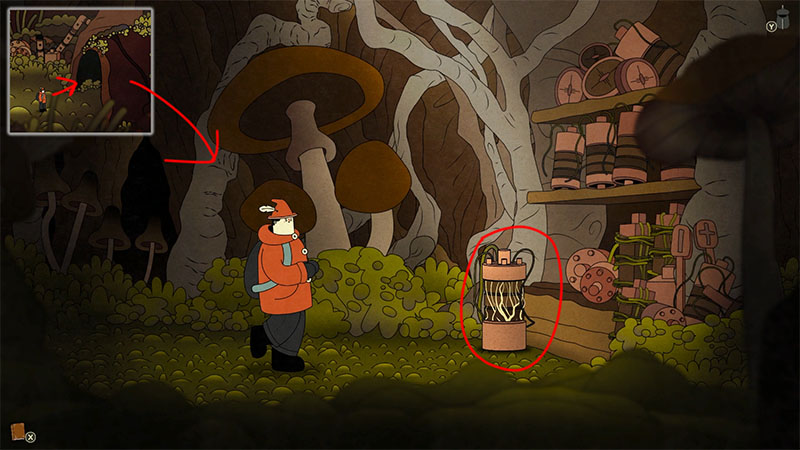
Once you have the battery, enter the room at the location marked in the screenshot.
Inside, you’ll need to turn the dial to restore power. You’ve seen this type of puzzle in the previous episode, and the solution is exactly the same: just follow the wire paths shown in the screenshot.
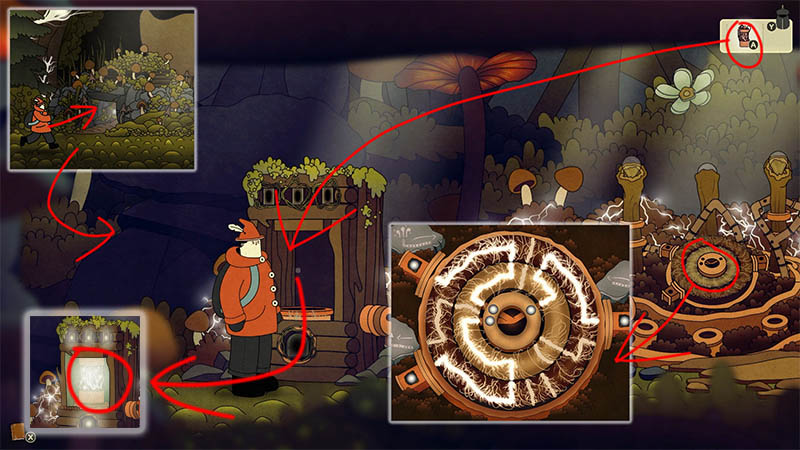
After powering it up, place the battery into the charging slot. Once the charging is complete, you’ll get a fully charged battery.
Once you have the battery, head to the screen with the sleeping giant to pick up the cup.
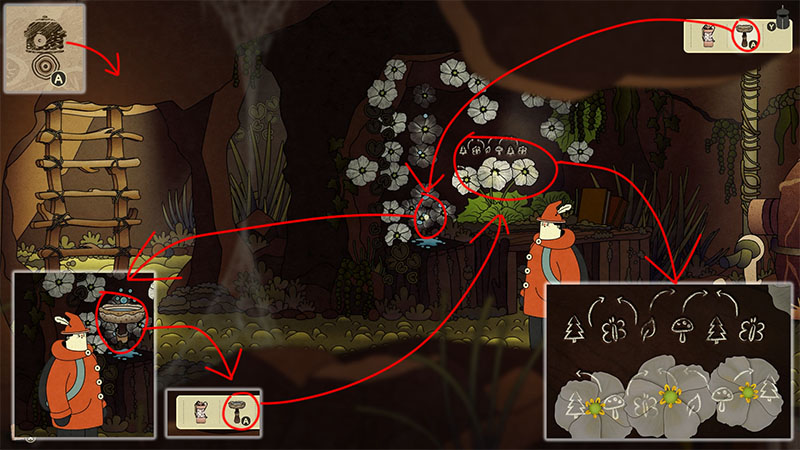
Teleport to the location shown in the screenshot, place the cup under the dripping water to fill it up, and then use it on the flower on the desk to reveal the full unlock code.
Don’t worry if the puzzle logic seems confusing—I’ll provide the exact solutions directly in the upcoming sections.
This is one of the toughest parts of this EP. Skipping the puzzle logic entirely, here is the exact unlock code.
Operation sequence: R-Leaf, R-Butterfly, L-Leaf, R-Butterfly, R-Mushroom, R-Tree, L-Butterfly
Note: Do not pause when switching from the tree pattern to the butterfly pattern. You must complete this transition quickly and continuously; otherwise, the code verification will fail.
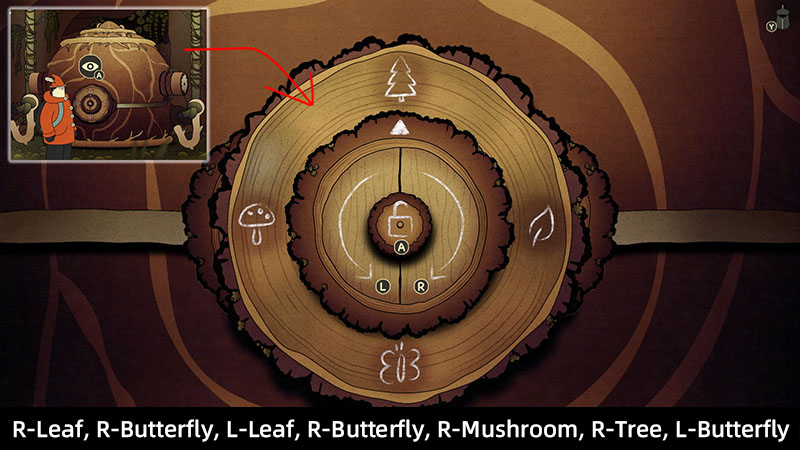
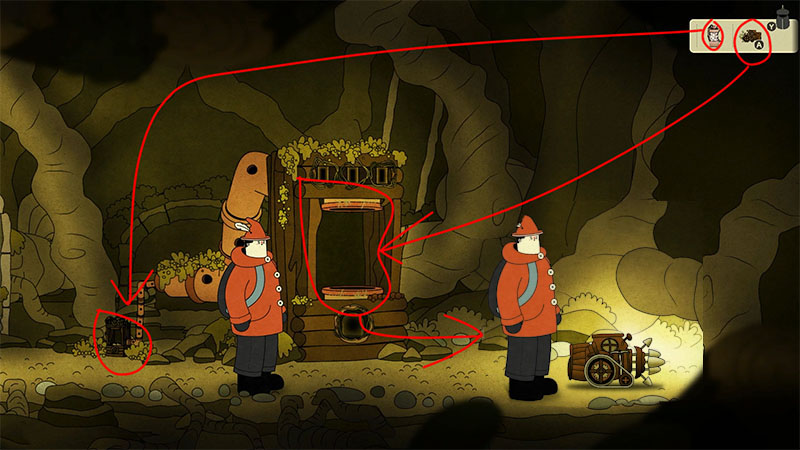
Once unlocked, head to the second floor and pull the lever to lift the large jar to the upper level.
Then, return to the first floor. You’ll find a device resembling a miniature mining machine—simply pick it up.
Head directly to the location shown in the screenshot. This is the second combination lock used to open the cellar door.
Operation sequence: L-Mushroom → R-Tree → R-Leaf → R-Butterfly → L-Leaf → L-Mushroom → R-Tree
Note: Just like last time, you must transition directly from Leaf to Mushroom without pausing, otherwise the unlock will fail.
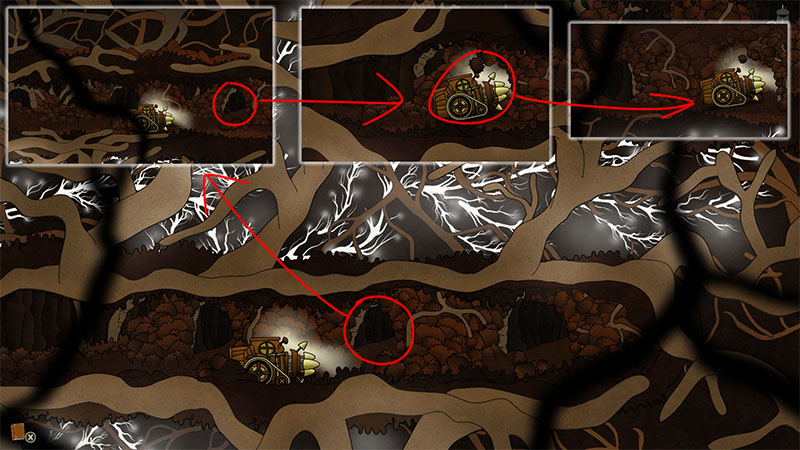
Once underground, you’ll see a charging station.
Unlike before, this time you need to place the battery into the left power slot, then put the mining cart onto the charging dock to charge it up.
Once the mining cart is fully charged, simply place it into the glowing small tunnel in the bottom right corner to enter.
Next up is the hardest part of the entire episode. During my first playthrough, I managed to get through it on my very first try. However, while writing this guide, I tested it again and discovered that the order of the tunnels is not fixed—it changes randomly. If you make a wrong turn, you’ll have to start all over again.
Although I’ve attached screenshots for reference, they might not match your current playthrough.
If you get stuck here, I highly recommend trial and error—just try the tunnels one by one, and you’ll get it after a few attempts. If luck is on your side, you might even pass it on your first try!

After passing through that cave system, you’ll enter a new cavern. I highly recommend picking up the pickaxe from the minecart first.
Since it’s incredibly easy to miss, grabbing it now is the safest bet.
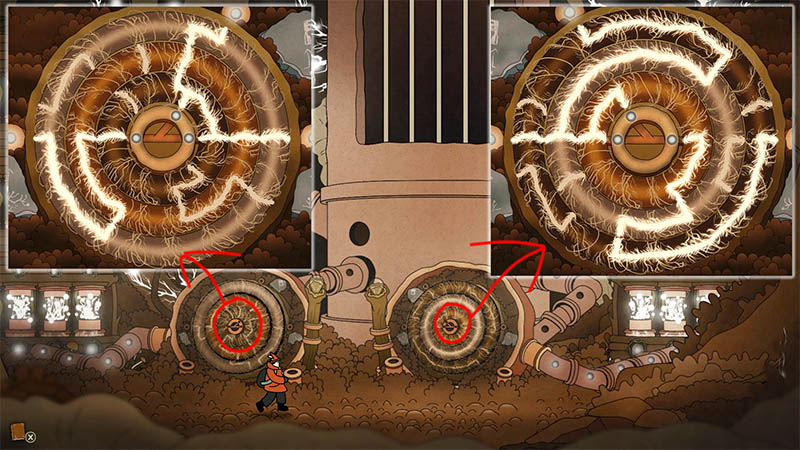
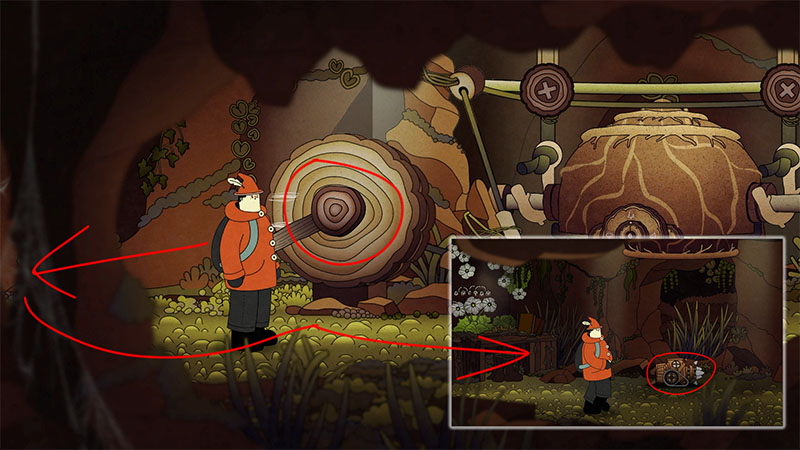
Once you have the pickaxe, keep heading right until you reach a massive power generator.
Here, you’ll need to turn two dials to connect the power lines. Don’t worry, though—I’ve provided a screenshot of the completed puzzle below, so you can just follow the picture to get it done.
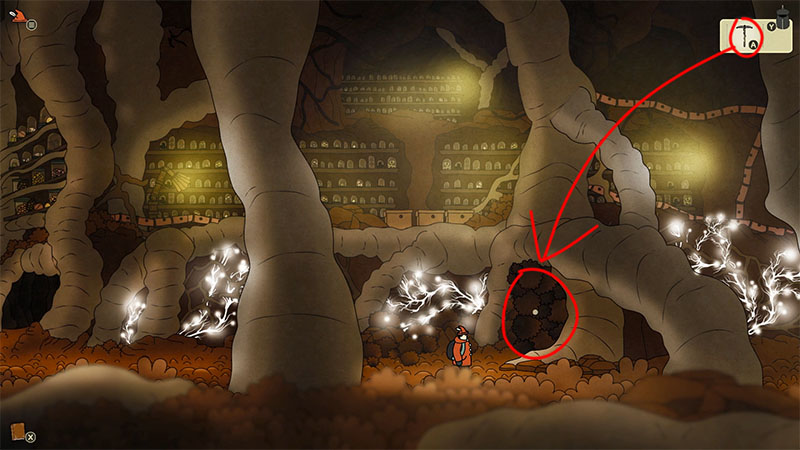
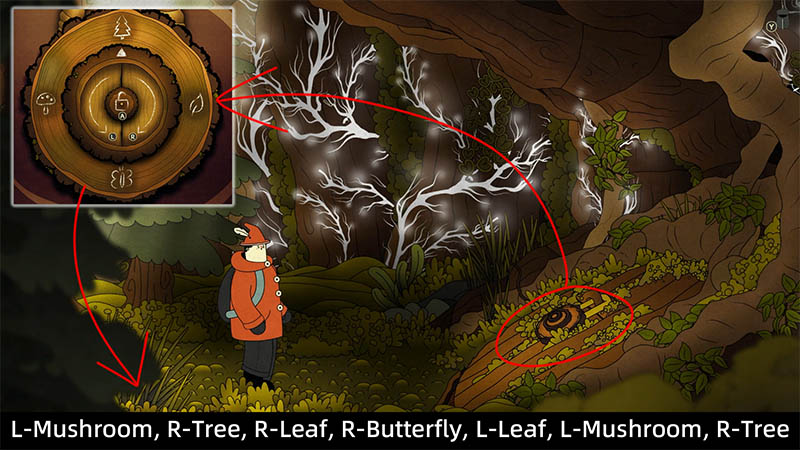
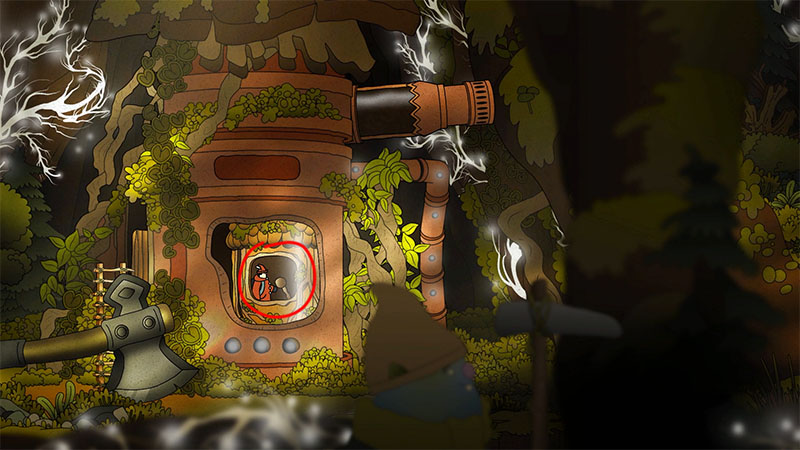
After powering up the generator, head left to the location shown in the screenshot.
This spot is incredibly easy to miss—simply use the pickaxe to break open the tunnel entrance to enter.
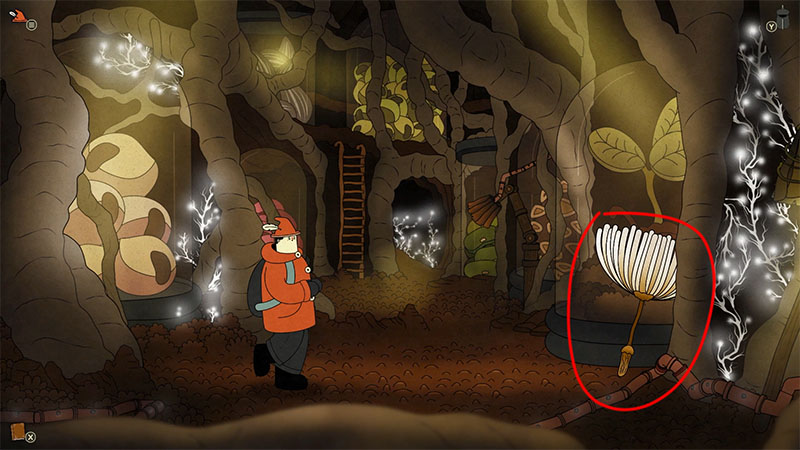
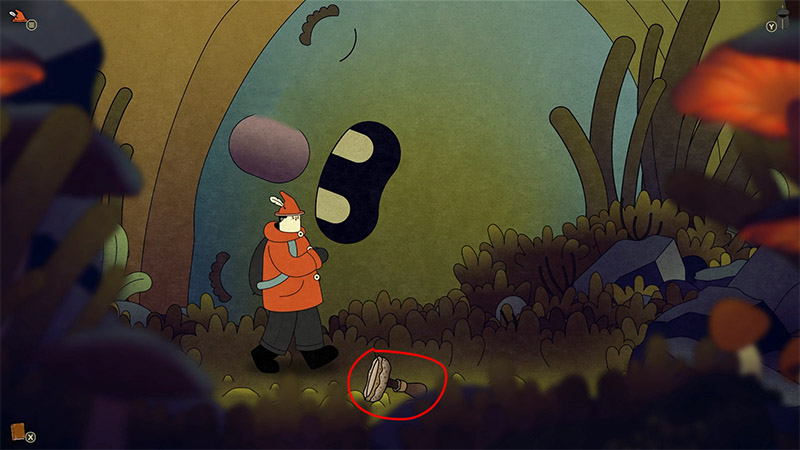
After entering the room, you’ll find and pick up a seed that looks like a tiny umbrella. I’m guessing it might be a dandelion seed, but I’m not totally sure, haha.
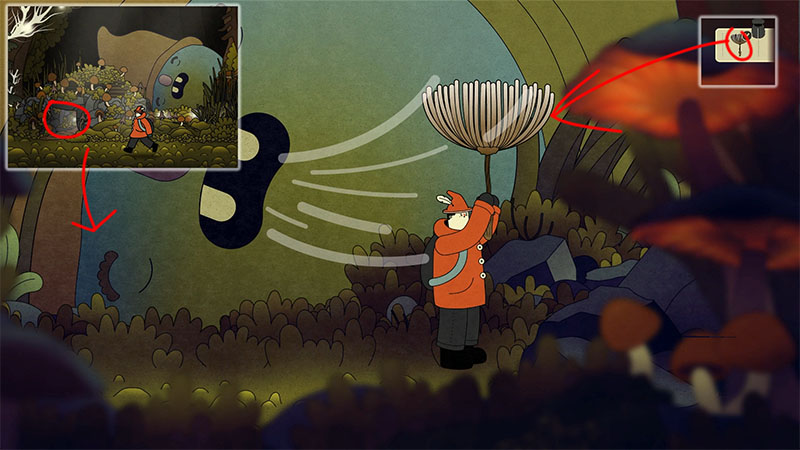
Remember that area with the sleeping giant? Head back there and use the dandelion seed you just picked up. You’ll catch the giant’s breath and get blown away.
Float directly over to the crane, and pull the lever to head straight into the next scene.
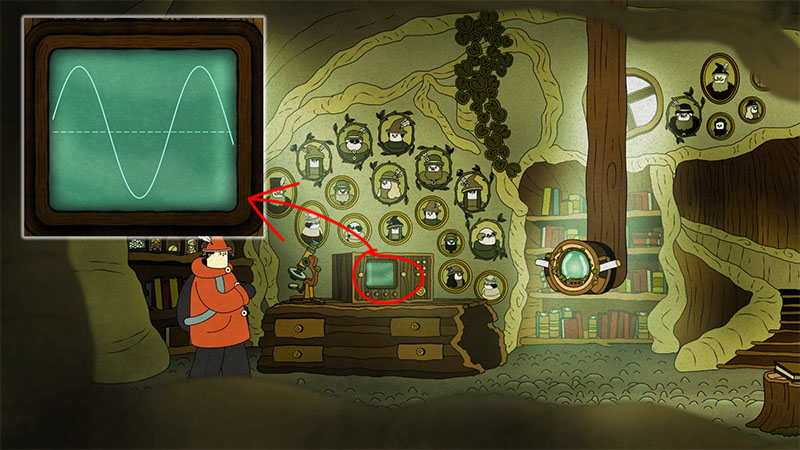
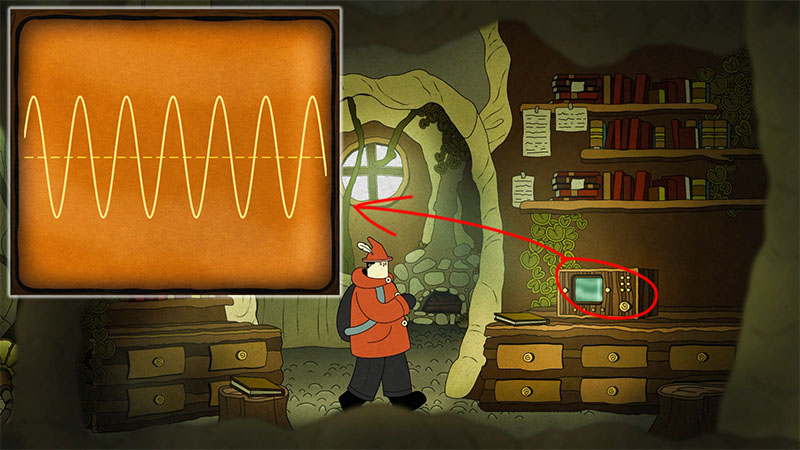
This is the final puzzle of the game, where you need to adjust the waveforms on three radio controllers. The room already provides a clue: observe the related symbols through the telescope, and then cross-reference them with the decoded waveforms shown in the room.
Skipping the explanations here, I’ll provide the solution directly. Please refer to the screenshots to set up the controllers in their respective positions.
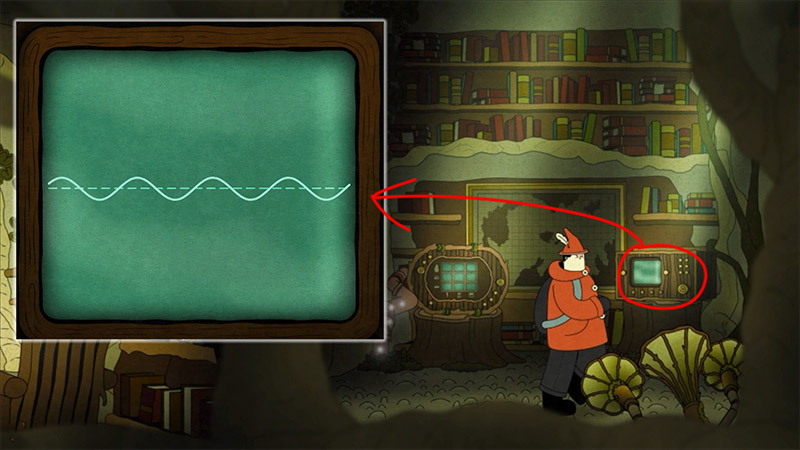
This is the second controller, located in the center of the room. There is a decoding pattern on its left for your reference—you can just set it up according to my screenshot, or take a closer look at that decoding pattern if you want to figure out how it works.
This is the controller on the far right of the room, and also the final one. Just set it up according to the screenshot, and you’re good to go!
Once all the puzzles are finally solved, the door to the outside controller will open.
Simply head over to activate the device, which will trigger the final cutscene and complete the game!